Recipe of Favorite Easy Lemon Pasta with Chicken

Recipe of Favorite Easy Lemon Pasta with Chicken

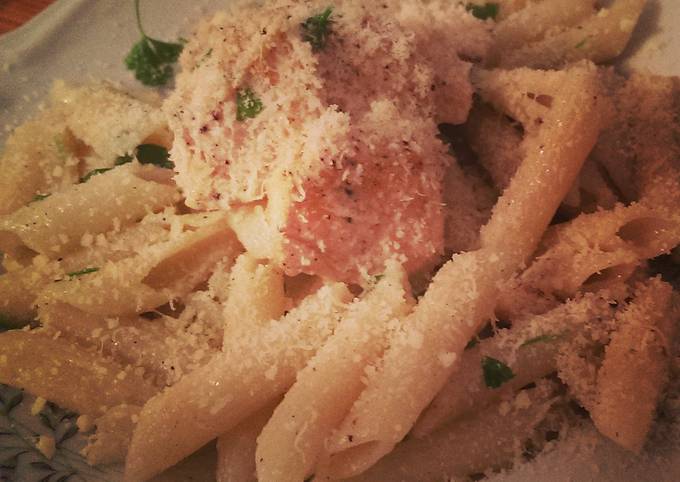
Easy Lemon Pasta with Chicken.

Easy Lemon Pasta with Chicken

Hey everyone, it is Brad, welcome to my recipe site. Today, I'm gonna show you how to make a distinctive dish, easy lemon pasta with chicken. It is one of my favorites food recipes. This time, I will make it a bit unique. This is gonna smell and look delicious.

Easy Lemon Pasta with Chicken is one of the most favored of recent trending meals in the world. It's easy, it's quick, it tastes delicious. It is appreciated by millions every day. They're nice and they look wonderful. Easy Lemon Pasta with Chicken is something which I have loved my entire life.

To begin with this particular recipe, we have to first prepare a few components. You can cook easy lemon pasta with chicken using 9 ingredients and 4 steps. Here is how you can achieve it.

The ingredients needed to make Easy Lemon Pasta with Chicken:

  1. {Prepare 1 lb of dried penne.
  2. {Take 2 of chicken cutlets, cut into fingers.
  3. {Make ready 1 of Salt and freshly ground black pepper.
  4. {Prepare 3 of garlic cloves, sliced.
  5. {Get 1/4 tsp of red pepper flakes.
  6. {Prepare 3 tbsp of olive oil.
  7. {Make ready 3 tbsp of chopped fresh parsley, for garnish.
  8. {Take 2 of lemons, juiced.
  9. {Prepare 1/2 cup of grated parmesan cheese.

Steps to make Easy Lemon Pasta with Chicken:

  1. Cook the pasta in a large pot of boiling salted water. Drain well..
  2. Season chicken with salt and pepper. Heat a large grill pan over medium high and add chicken. Grill until golden and completely cooked. Remove to a plate and slice..
  3. Add the garlic and red pepper flakes to a salute pan with 3 tbs of olive oil and salute until fragrant. Add the cooked pasta and turn the heat off. Mix altogether..
  4. Remove pasta to a large bowl. Add chicken to the warm pasta and season with salt and pepper. Sprinkle with parsley. Add the juice of two lemons and mix. Top with parmesan and serve..

So that's going to wrap this up for this exceptional food easy lemon pasta with chicken recipe. Thank you very much for reading. I'm sure you will make this at home. There's gonna be interesting food at home recipes coming up. Don't forget to bookmark this page in your browser, and share it to your loved ones, friends and colleague. Thanks again for reading. Go on get cooking!

Easiest Way to Prepare Favorite Raspberry Coconut Chia Pudding

Easiest Way to Prepare Favorite Raspberry Coconut Chia Pudding

Raspberry Coconut Chia Pudding.

Raspberry Coconut Chia Pudding

Hello everybody, it's John, welcome to our recipe page. Today, I will show you a way to make a special dish, raspberry coconut chia pudding. It is one of my favorites. For mine, I'm gonna make it a bit tasty. This will be really delicious.

Raspberry Coconut Chia Pudding is one of the most popular of current trending foods in the world. It's simple, it's fast, it tastes delicious. It's appreciated by millions every day. They are fine and they look wonderful. Raspberry Coconut Chia Pudding is something which I have loved my whole life.

To get started with this particular recipe, we must prepare a few components. You can have raspberry coconut chia pudding using 5 ingredients and 4 steps. Here is how you can achieve it.

The ingredients needed to make Raspberry Coconut Chia Pudding:

  1. {Prepare 12 oz of light coconut milk.
  2. {Prepare 1/3 cup of chia seeds.
  3. {Make ready 1/4 cup of agave nectar.
  4. {Prepare 1/2 tsp of vanilla.
  5. {Get 6 oz of raspberry.

Instructions to make Raspberry Coconut Chia Pudding:

  1. Combine all ingredients except for raspberries and mix well..
  2. Chill for 4 hours, or until chia seeds expand and absorb coconut milk..
  3. Stir once more and spoon into serving dishes..
  4. Top with fresh raspberries or raspberry coulis..

So that is going to wrap this up for this special food raspberry coconut chia pudding recipe. Thanks so much for your time. I'm sure that you will make this at home. There is gonna be interesting food in home recipes coming up. Don't forget to bookmark this page on your browser, and share it to your family, colleague and friends. Thanks again for reading. Go on get cooking!

Step-by-Step Guide to Prepare Favorite Argentinian Crumb Sandwiches

Step-by-Step Guide to Prepare Favorite Argentinian Crumb Sandwiches

Argentinian Crumb Sandwiches.

Argentinian Crumb Sandwiches

Hello everybody, hope you're having an amazing day today. Today, I'm gonna show you how to make a distinctive dish, argentinian crumb sandwiches. One of my favorites food recipes. For mine, I will make it a bit unique. This will be really delicious.

Argentinian Crumb Sandwiches is one of the most popular of recent trending foods in the world. It's enjoyed by millions daily. It is easy, it's fast, it tastes delicious. Argentinian Crumb Sandwiches is something which I have loved my entire life. They are nice and they look wonderful.

To begin with this recipe, we must first prepare a few components. You can have argentinian crumb sandwiches using 30 ingredients and 23 steps. Here is how you cook it.

The ingredients needed to make Argentinian Crumb Sandwiches:

  1. {Take 40 slices of white classic bread.
  2. {Prepare of Necessary amount of:.
  3. {Make ready of Butter room temperature.
  4. {Make ready slices of Ham.
  5. {Take of Plum Tomato finely sliced.
  6. {Prepare of Lettuce, finely chopped.
  7. {Prepare slices of Cheese.
  8. {Prepare of Blue cheese mixed with butter.
  9. {Take of Tuna mixed with mayonnaise.
  10. {Prepare of For preparing the bread we will need:.
  11. {Take 1 of sharp knife.
  12. {Get 1 of large baking dish(to flatten sandwiches).
  13. {Get of Cutting board.
  14. {Get 1 container of to store them.
  15. {Make ready 1 of clean moistened dish towel or paper towels.
  16. {Take 1 of set of flat Chinese chopsticks.
  17. {Get slices of Bread.
  18. {Get of Cream Spread:.
  19. {Take of A. The main spread that I use in this recipe.
  20. {Make ready of Ingredients:.
  21. {Take 7.5 oz. of butter without salt (room temperature).
  22. {Prepare 3 tablespoons of water.
  23. {Prepare 5 tablespoons of oil.
  24. {Make ready 1/2 teaspoon of salt.
  25. {Get of b:.
  26. {Make ready of Mayonnaise and whipped cream in equal parts, whipped.
  27. {Prepare of c:.
  28. {Get of Butter room temperature and water in equal parts, whipped.
  29. {Get of d:.
  30. {Take 2 cups of mayonnaise for 1 of water, whipped.

Steps to make Argentinian Crumb Sandwiches:

  1. Cream Spread Preparation, ingredients:.
  2. In a bowl place the butter, with a fork whip the mixture.
  3. Add the water, beat it well until it is completely integrated.
  4. Add half of the oil, integrate Then the other half, beat it until you achieve a cream that is easy to spread.
  5. Bread Preparation, ingredients.
  6. Separate the chopsticks On a chopping board place one of the chopsticks, 2 slices of bread next to each other and then the other chopstick.
  7. Place baking dish on top of the bread, press hard until the baking dish touches the chopsticks.
  8. Remove the bread, cut the edges Place the bread in a bowl, cover with the moist towel.
  9. Continue doing the same procedure until all the bread is finished Keep them continuously covered with the moist towel so they do not dry out.
  10. Sandwich Preparation, ingredients.
  11. Simple Crumb Sandwiches (base) Usually the simple crumb sandwiches are made with cooked ham, cheese and prosciutto ham, assemble it with two slices of bread for each sandwich, spread it with the spread cream preparation, you can eat alone or use them as a base to make the sandwich that it is called triple (it has three slices of bread)..
  12. Simple Crumb Sandwiches Preparation: On a clean surface place two slices of bread, spread with a non-excessive amount of the spread cream preparation Place a slice of ham on the side of the bread with the spread and cover with the other slice Do the same procedure with cheese or Prosciutto ham.
  13. Keep them continuously covered with the moist towel so they do not dry out.
  14. Triple Crumb Sandwiches: To arrange the tripes sandwiches, the simple ones was combined with different ingredients, you can choose from those that are in my list or the combination that you like, to taste..
  15. Triple Crumb Sandwiches, preparation: On a clean surface place 3 slices of bread, spread the top of each slice with the spread cream On one slice of bread place the ham, cover with the other slice leaving the part smeared inwards, spread with cream the top part of the bread, place the tomato and cover it with the slice of bread remaining The tomato should not have salt (salt makes it sweat).
  16. Repeat the same steps changing the combination of ingredients: ham and lettuce, ham and cheese, tuna and cheese, ham and blue cheese Place each sandwich inside the container and cover it with the moist towel, it should always be wet and covered You can use the simple sandwiches to make the triples, spreading the top of the slice with cream and adding to it the combination that you like.
  17. Ham and Lettuce Triple Crumb Sandwich.
  18. Ham and cheese Triple Crumb Sandwich.
  19. Tuna and Cheese Tripple Crumb Sandwich To prepare the tuna sandwich mix the tuna with mayonnaise.
  20. .
  21. Ham and Blue Cheese Tripple Crumb Sandwich To prepare the blue cheese sandwich, mix the cheese with butter at room temperature.
  22. .
  23. I invite you to prepare it and share with your loved ones..

So that's going to wrap it up for this special food argentinian crumb sandwiches recipe. Thank you very much for reading. I'm confident you will make this at home. There's gonna be more interesting food at home recipes coming up. Remember to bookmark this page in your browser, and share it to your family, colleague and friends. Thank you for reading. Go on get cooking!

Step-by-Step Guide to Prepare Ultimate Front St Heat Crack Dip

Step-by-Step Guide to Prepare Ultimate Front St Heat Crack Dip

Front St Heat Crack Dip.

Front St Heat Crack Dip

Hello everybody, it's Drew, welcome to my recipe page. Today, I will show you a way to make a special dish, front st heat crack dip. One of my favorites food recipes. This time, I am going to make it a little bit unique. This is gonna smell and look delicious.

Front St Heat Crack Dip is one of the most popular of current trending meals on earth. It's simple, it is fast, it tastes yummy. It is enjoyed by millions daily. Front St Heat Crack Dip is something that I've loved my entire life. They're fine and they look wonderful.

To get started with this particular recipe, we must first prepare a few components. You can have front st heat crack dip using 7 ingredients and 5 steps. Here is how you can achieve that.

The ingredients needed to make Front St Heat Crack Dip:

  1. {Make ready 8 oz. of package cream cheese, softened.
  2. {Get 2 cups of cheddar, shredded.
  3. {Get 1 package of ranch dressing mix.
  4. {Prepare 5 pieces of cooked bacon, chopped.
  5. {Make ready 1 cup of sour cream.
  6. {Get 1/2 cup of Front St Heat.
  7. {Take of Thinly sliced green onions, for garnish.

Instructions to make Front St Heat Crack Dip:

  1. Preheat oven to 400°F..
  2. In a medium mixing bowl, combine all ingredients..
  3. Transfer to 9x9 baking dish..
  4. Cook for 25-30 minutes, or until hot and bubbling..
  5. Remove from oven, top with green onion and serve warm..

So that's going to wrap this up for this exceptional food front st heat crack dip recipe. Thank you very much for your time. I am confident that you can make this at home. There is gonna be interesting food in home recipes coming up. Don't forget to save this page on your browser, and share it to your family, colleague and friends. Thanks again for reading. Go on get cooking!

Recipe of Super Quick Homemade Egg Biryani

Recipe of Super Quick Homemade Egg Biryani

Egg Biryani.

Egg Biryani

Hello everybody, it's me again, Dan, welcome to my recipe site. Today, I will show you a way to prepare a special dish, egg biryani. One of my favorites. For mine, I will make it a little bit unique. This will be really delicious.

Egg Biryani is one of the most popular of recent trending foods in the world. It is enjoyed by millions every day. It's easy, it is fast, it tastes yummy. They're nice and they look fantastic. Egg Biryani is something that I have loved my entire life.

To begin with this recipe, we have to first prepare a few ingredients. You can cook egg biryani using 16 ingredients and 11 steps. Here is how you cook that.

The ingredients needed to make Egg Biryani:

  1. {Get 4-5 of eggs.
  2. {Get 2 cups of Long grain Basmati Rice (Daawat Biryani rice).
  3. {Make ready 1 tsp of Dry spices like Bay leaves, cinnamon, cloves and black pepper.
  4. {Get 1 of large onion finely chopped.
  5. {Take 1 of medium sized tomato finely chopped.
  6. {Prepare 2 of green chillies.
  7. {Get 1 tbsp of ginger garlic paste.
  8. {Prepare 1 tsp of cumin seeds.
  9. {Take As needed of Ghee, cooking oil.
  10. {Take 1 tsp of Everest Shahi Biryani Masala.
  11. {Take 1 tbsp of Kashmiri Chilli powder.
  12. {Prepare 1 tbsp of Turmeric powder.
  13. {Prepare 2-3 tbsp of crispy fried onion.
  14. {Take 1 tbsp of curd.
  15. {Make ready 1 tsp of Coriander leaves for garnishing.
  16. {Make ready as per taste of Salt.

Instructions to make Egg Biryani:

  1. Boil the eggs, deshell them and poke with the help of a fork or knife to create holes or slits. Coat the eggs in a mixture of some turmeric and red chilli powder and shallow fry till the outer surface becomes crisp..
  2. Wash the rice 3-4 times and soak in water for about 20-30 mins. In a large pan, boil some water. Add 1-2 bay leaves, 2-3 pods of cloves and black pepper each and a small stick of cinnamon. Add the soaked rice, 1 tbsp ghee and some salt and let it cook on medium heat. Drain the water once the rice is cooked upto 90 %..
  3. In a pan, heat 1tbsp ghee and 2 tbsp oil. Add 1-2 bay leaves and cumin seeds..
  4. Once it starts spluttering, add finely chopped onion and green chilli and cook till it turns pink and aromatic. Add the ginger garlic paste and cook till the garlicy aroma fades away. At this stage add the tomatoes and cook till it becomes mushy..
  5. Add 1/2 tsp turmeric powder, 2 tsp red chilli powder, and 1 tbsp Shahi Biryani masala. Stir well..
  6. Add 1 tbsp curd to this mixture and very little salt and mix well. Note: be careful with the salt at this stage, as we have already added salt whole cooking the rice. Cover the pan with a lid and let it cook nicely for 4-5 minutes..
  7. Put the fried eggs in this masala and coat them well. Put off the gas..
  8. Start layering the cooked rice on top of the masala. You can remove some of the masala and cover it later on the rice to create multi-layered Biryani..
  9. Pre-Heat a tawa (should be large enough to hold the cooking pan). Once the layering is done, cover the pan and put it on the tawa and let it cook for another 15-20 mins on low to medium flame with lid on, till the rice is completely cooked and the masala starts integrating with the rice..
  10. After 15 mins, turn off the heat. Garnish the Biryani with Coriander leaves..
  11. While serving, plate out some white rice and then the masala beneath it..

So that's going to wrap this up with this special food egg biryani recipe. Thanks so much for your time. I'm sure that you can make this at home. There is gonna be more interesting food at home recipes coming up. Remember to save this page in your browser, and share it to your loved ones, friends and colleague. Thank you for reading. Go on get cooking!

Simple Way to Prepare Perfect Chocolate cake with caramel coffee mousse
filling

Simple Way to Prepare Perfect Chocolate cake with caramel coffee mousse filling

Chocolate cake with caramel coffee mousse filling.

Chocolate cake with caramel coffee mousse filling

Hello everybody, it's me, Dave, welcome to our recipe page. Today, we're going to make a distinctive dish, chocolate cake with caramel coffee mousse filling. One of my favorites. For mine, I will make it a bit tasty. This is gonna smell and look delicious.

Chocolate cake with caramel coffee mousse filling is one of the most favored of recent trending foods on earth. It's easy, it is quick, it tastes delicious. It is appreciated by millions daily. They're fine and they look wonderful. Chocolate cake with caramel coffee mousse filling is something that I've loved my whole life.

To begin with this particular recipe, we have to prepare a few ingredients. You can have chocolate cake with caramel coffee mousse filling using 22 ingredients and 30 steps. Here is how you can achieve it.

The ingredients needed to make Chocolate cake with caramel coffee mousse filling:

  1. {Make ready of unsweetened chocolate , finely chopped.
  2. {Take of cocoa Dutch - process powder (3/4 oz).
  3. {Make ready of water hot.
  4. {Prepare of sugar (12¼ oz).
  5. {Get of all-purpose flour (8¾ oz).
  6. {Take of baking soda.
  7. {Prepare of salt.
  8. {Get of buttermilk , at room temperature.
  9. {Prepare of vanilla extract.
  10. {Take of eggs egg yolks large 2 large plus , at room temperature.
  11. {Get of unsalted butter , cut into pieces , at room temperature (1½ sticks) 12.
  12. {Make ready of sugar.
  13. {Make ready of water.
  14. {Get of lemon juice fresh.
  15. {Prepare of heavy cream.
  16. {Make ready of vanilla extract pure.
  17. {Get of coffee instant (3 single-serving packets).
  18. {Get of gelatin envelope unflavored (about 2 teaspoons).
  19. {Make ready of Caramel (see above).
  20. {Take of crème fraîche ( I used homemade)(Check the recipe here creme fraiche).
  21. {Make ready of dark chocolate.
  22. {Get of heavy cream.

Steps to make Chocolate cake with caramel coffee mousse filling:

  1. For the caramel:.
  2. In a medium saucepan, combine the sugar with the water and lemon juice and bring to a boil over moderately high heat..
  3. Using a wet pastry brush, wipe down the side of the saucepan..
  4. Simmer the syrup undisturbed until it begins to brown around the edges, 4 to 5 minutes..
  5. Swirl the pan, then simmer until the caramel turns a medium-dark amber, about 3 minutes longer. Remove from the heat..
  6. Carefully add ½ cup of the cream in a steady stream. Stir with a long-handled wooden spoon to combine, then add the remaining 1½ cups of cream. Stir in the vanilla..
  7. Transfer the caramel to a bowl and refrigerate until very cold, at least 3 hours or overnight..
  8. For the cake:.
  9. Preheat oven to 350 F. Spray two 9″ inch cake pans with nonstick cooking spray with flour (you can line the bottoms with parchment as well if you want. I used two tall 6 inch pans)..
  10. Add the unsweetened chocolate, cocoa powder and water to a heatproof bowl and set over a pan of barely simmering water. Stir occasionally until the chocolate is completely melted (the mixture will be thick). Whisk in ½ cup of the sugar until well combined and the mixture becomes glossy. Remove the bowl from the pan and set aside to cool slightly..
  11. In a medium bowl, whisk together the flour, baking soda and salt. In a measuring cup, whisk the buttermilk and vanilla together..
  12. In the bowl, combine the eggs and egg yolks with a whisk or hand mixer. Beat on medium-low speed until combined, about 10 seconds. Add the remaining 1¼ cups of sugar and beat on high speed until the mixture is fluffy and pale in color, about 2-3 minutes..
  13. Pour the cooled chocolate mixture into the mixer bowl and beat on low until well combined. Scrape down the sides of the bowl..
  14. Add the butter, one piece at a time, mixing for about 10 seconds after each addition..
  15. Now alternately add the flour mixture (in 3 additions) and the buttermilk mixture (in 2 additions), starting and ending with the flour mixture. The batter may look slightly curdled. Beat until thoroughly combined..
  16. Divide the batter between the prepared cake pans, smoothing the top until even. Bake for 25-30 minutes (took longer for my layers to bake), or until a toothpick inserted in the center comes out with just a few moist crumbs attached. Remove the pans to a wire rack and let the cakes cool for 10 minutes. Turn the cakes out of the pans and allow to cool completely, at least 2 hours. I covered it completely with cling wrap and placed it in the refrigerator to cool for 6 hours..
  17. For the coffee-caramel mousse:.
  18. In a small microwave-safe bowl, dissolve the instant coffee in 3 tablespoons of cold water. Sprinkle on the gelatin and let stand until softened, about 5 minutes. Using an electric mixer, beat the caramel with the crème fraîche just until soft peaks form. Working quickly, microwave the coffee-gelatin mixture at 10-second intervals just until the gelatin is completely dissolved and hot to the touch. Quickly whisk the hot gelatin into the caramel..
  19. Assembly:.
  20. Using a sharp pointed serrated knife, cut a cone out of the center of both cake layers so that you have a cone-shaped recess in each cake layer. Be sure to leave enough cake around the sides and at the bottom otherwise it may not be able to stand. Also make sure the cones are the same sizes so when assembled a clean diamond mousse filling will form..
  21. Fill each recess with the mousse. Use an icing spatula to make the mousse level with the top of the cake..
  22. Place the mousse-filled layers in the fridge and let chill until firm, about 1 hour..
  23. Remove the layers from the fridge. Carefully invert one layer onto the other, making sure the edges of the cake, and the mousse line up. Remove the cake round from the top of the cake..
  24. Once done, cover with cling wrap completely and let it sit in the refrigerator overnight..
  25. Day 2: Cover the cake with ganache..
  26. Make the ganache:.
  27. Place the chocolate into a medium bowl. Heat the cream in a small sauce pan over medium heat. Bring just to a boil, watching very carefully because if it boils for a few seconds, it will boil out of the pot. When the cream has come to a boil, pour over the chopped chocolate, and whisk until smooth. Let it set for some time till it becomes thick. I kept it outside for 6 hours..
  28. To cover the cake with ganache, check out these videos that I took the help of. I followed the upside down method and it is very convenient..
  29. Link How to cover your cake in ganache.
  30. Let it set in the refrigerator overnight.Day 3: Cover the cake with edible sequins and gold paint..

So that's going to wrap it up with this exceptional food chocolate cake with caramel coffee mousse filling recipe. Thanks so much for your time. I'm sure you can make this at home. There's gonna be more interesting food at home recipes coming up. Don't forget to bookmark this page in your browser, and share it to your family, colleague and friends. Thank you for reading. Go on get cooking!

How to Prepare Quick Swordfish Poached in a Jalapeño Lemon Butter Sauce

How to Prepare Quick Swordfish Poached in a Jalapeño Lemon Butter Sauce

Swordfish Poached in a Jalapeño Lemon Butter Sauce.

Swordfish Poached in a Jalapeño Lemon Butter Sauce

Hello everybody, it's me, Dave, welcome to our recipe page. Today, we're going to prepare a special dish, swordfish poached in a jalapeño lemon butter sauce. It is one of my favorites. This time, I will make it a bit tasty. This will be really delicious.

Swordfish Poached in a Jalapeño Lemon Butter Sauce is one of the most favored of current trending meals in the world. It's simple, it is quick, it tastes yummy. It is enjoyed by millions daily. Swordfish Poached in a Jalapeño Lemon Butter Sauce is something which I've loved my entire life. They're nice and they look wonderful.

To get started with this particular recipe, we have to first prepare a few components. You can cook swordfish poached in a jalapeño lemon butter sauce using 12 ingredients and 7 steps. Here is how you cook that.

The ingredients needed to make Swordfish Poached in a Jalapeño Lemon Butter Sauce:

  1. {Take 2 of swordfish steaks.
  2. {Get of Seasoning for fish and baby Bok choy (I used Weber Roasted Garlic Asiago).
  3. {Take 4-6 of baby Bok choy.
  4. {Get 4 of large mushrooms sliced.
  5. {Prepare 1 of shallot or small onion minced.
  6. {Prepare 1 of jalapeño minced.
  7. {Prepare 2 of garlic cloves minced.
  8. {Get 1/2 cup of white wine.
  9. {Make ready 1 cup of chicken broth.
  10. {Make ready 1/2 cup of heavy cream.
  11. {Take 4 Tbsp of fresh lemon juice.
  12. {Get 6 Tbsp of butter.

Instructions to make Swordfish Poached in a Jalapeño Lemon Butter Sauce:

  1. Season both sides of fish with a seasoning of your choice. Add olive oil and butter to pan. On high heat sear both sides of fish and remove fish to a plate..
  2. Cut Bok choy in half, brush cut side with olive oil and season. Sear cut side and remove to plate..
  3. Sauté shallot, jalapeño and mushrooms to soften. Add salt and pepper to taste. Then add garlic and cook for 1 minute..
  4. Add white wine and bring to a boil. Cook until almost all of the wine is gone..
  5. Add chicken broth, heavy cream, lemon juice, and butter. Bring sauce to a boil and reduce sauce by about 1/3, which is enough to thicken it..
  6. Return swordfish and Bok choy to pan, cover and on low heat cook fish to an internal temperature of 100-105 F..
  7. Plate fish and vegetables. Serve additional sauce on the side..

So that is going to wrap it up for this exceptional food swordfish poached in a jalapeño lemon butter sauce recipe. Thank you very much for your time. I am sure that you will make this at home. There's gonna be interesting food in home recipes coming up. Don't forget to save this page on your browser, and share it to your family, friends and colleague. Thanks again for reading. Go on get cooking!

How to Make Ultimate Mike's Creamy Feta Bagel Cucumber Spread Or Dip

How to Make Ultimate Mike's Creamy Feta Bagel Cucumber Spread Or Dip

Mike's Creamy Feta Bagel Cucumber Spread Or Dip.

Mike's Creamy Feta Bagel Cucumber Spread Or Dip

Hey everyone, it is John, welcome to my recipe page. Today, I'm gonna show you how to prepare a distinctive dish, mike's creamy feta bagel cucumber spread or dip. One of my favorites. For mine, I am going to make it a little bit unique. This is gonna smell and look delicious.

Mike's Creamy Feta Bagel Cucumber Spread Or Dip is one of the most popular of recent trending meals on earth. It's enjoyed by millions every day. It's easy, it is fast, it tastes yummy. Mike's Creamy Feta Bagel Cucumber Spread Or Dip is something which I have loved my entire life. They are fine and they look fantastic.

To begin with this recipe, we have to first prepare a few ingredients. You can cook mike's creamy feta bagel cucumber spread or dip using 23 ingredients and 4 steps. Here is how you cook that.

The ingredients needed to make Mike's Creamy Feta Bagel Cucumber Spread Or Dip:

  1. {Take of ● For The Feta Spread/Dip.
  2. {Take 1 Cup of Philadelphia Cream Cheese.
  3. {Make ready 1/2 Cup of Philadelphia Chives & Onion Cream Cheese.
  4. {Take 8 oz of Crumbled Feta Cheese.
  5. {Make ready 1 Cup of Quality Sour Cream.
  6. {Take 1/2 Cup of Fresh Chopped Chives [+reserves for garnish].
  7. {Get 1 of LG Cucumber [fine chopped - deseeded].
  8. {Prepare 1/2 Cup of Fine Chopped Celery.
  9. {Take 2 tbsp of Fine Minced Fresh Dill.
  10. {Make ready 1/2 tbsp of Fine Minced Garlic.
  11. {Take 2 tbsp of Fine Minced Fresh Parsley.
  12. {Prepare 1 tbsp of Fresh Lemon Juice.
  13. {Take 1 tsp of Lemon Zest.
  14. {Prepare 1/2 tbsp of Fresh Ground Black Pepper Or White Pepper.
  15. {Get 1/2 tsp of Fresh Mint.
  16. {Make ready of ● For The Sides [as needed].
  17. {Prepare of Stonefire Mini Naan Breads.
  18. {Prepare of Fresh Toasted Bagels.
  19. {Take of Quality Crackers.
  20. {Prepare of Bell Peppers.
  21. {Prepare of Carrots.
  22. {Take of Celery.
  23. {Prepare of Fresh Parsley [for garnish].

Steps to make Mike's Creamy Feta Bagel Cucumber Spread Or Dip:

  1. Mince all vegetables and gently mix everything together well. Chill for two hours. Serve with sides..
  2. Great on warm Pita bread!.
  3. Stonefire Mini Breads pictured..
  4. Enjoy!.

So that is going to wrap this up for this exceptional food mike's creamy feta bagel cucumber spread or dip recipe. Thanks so much for your time. I am sure you will make this at home. There's gonna be interesting food in home recipes coming up. Remember to save this page on your browser, and share it to your family, colleague and friends. Thanks again for reading. Go on get cooking!

Recipe of Any-night-of-the-week Crispy Veg Strips

Recipe of Any-night-of-the-week Crispy Veg Strips

Crispy Veg Strips.

Crispy Veg Strips

Hello everybody, it's Louise, welcome to our recipe site. Today, we're going to make a special dish, crispy veg strips. One of my favorites food recipes. This time, I'm gonna make it a little bit unique. This is gonna smell and look delicious.

Crispy Veg Strips is one of the most popular of recent trending foods in the world. It's enjoyed by millions daily. It's simple, it is fast, it tastes delicious. They're fine and they look wonderful. Crispy Veg Strips is something which I have loved my entire life.

To begin with this particular recipe, we must first prepare a few components. You can cook crispy veg strips using 13 ingredients and 5 steps. Here is how you cook it.

The ingredients needed to make Crispy Veg Strips:

  1. {Take of boiled and grated potatoes.
  2. {Get of green peas.
  3. {Take of chopped carrots.
  4. {Prepare of chopped capsicum.
  5. {Prepare of chopped onions.
  6. {Get of paneer.
  7. {Prepare of ginger garlic chillies paste.
  8. {Make ready of Chopped cilantro.
  9. {Take of bread crumbs.
  10. {Take of cornflour slurry.
  11. {Take of white sauce.
  12. {Get of Oil for tempering and frying.
  13. {Make ready of Accompaniments like chutney,dips,ketchup.

Steps to make Crispy Veg Strips:

  1. Chop all the vegetables and keep them aside..
  2. Heat oil in a pan. Add garlic Paste. Now add the grated ginger and chopped chilies. Saute well. Add onions. Now add the chopped capsicum & carrots. Do not overcook vegetable should be crunchy. Add the grated potatoes, paneer & breadcrumbs. Let the mix cool. How spread it on a flat surface flatten it and even it from all the sides. Refrigerate it for 20 mins..
  3. Keep cornflour slurry and bread crumbs ready Remove the stuffing from the refrigerator make vertical and horizontal cuts in the form of strips Remove each strip of cotton corn flour salary (one can also use white sauce) and roll it in bread crumbs leave it in the breadcrumbs for some time before removing it for frying..
  4. Deep fry in oil on a medium flame till the strips turn golden brown. Turn it continuously so that it does not burn..
  5. Remove in a serving plate Serve it with green chutney or any dip of your choice..

So that's going to wrap it up for this exceptional food crispy veg strips recipe. Thank you very much for your time. I am sure that you will make this at home. There's gonna be more interesting food in home recipes coming up. Remember to save this page on your browser, and share it to your family, friends and colleague. Thanks again for reading. Go on get cooking!

Recipe of Award-winning Persian Chelo Kabab with Saffron rice

Recipe of Award-winning Persian Chelo Kabab with Saffron rice

Persian Chelo Kabab with Saffron rice.

Persian Chelo Kabab with Saffron rice

Hello everybody, it is Louise, welcome to my recipe page. Today, we're going to prepare a special dish, persian chelo kabab with saffron rice. It is one of my favorites. For mine, I will make it a bit tasty. This is gonna smell and look delicious.

Persian Chelo Kabab with Saffron rice is one of the most popular of current trending meals in the world. It's appreciated by millions daily. It's easy, it is quick, it tastes yummy. Persian Chelo Kabab with Saffron rice is something which I've loved my entire life. They are fine and they look wonderful.

To begin with this particular recipe, we must prepare a few ingredients. You can cook persian chelo kabab with saffron rice using 18 ingredients and 4 steps. Here is how you can achieve that.

The ingredients needed to make Persian Chelo Kabab with Saffron rice:

  1. {Prepare 1/2 Kg of Beef mince ….
  2. {Prepare 1 of Onion (Raw Paste) ….
  3. {Make ready 1 Tsp of Salt ….
  4. {Take 1 Tbsp of Ginger (Crushed) ….
  5. {Take 1 Tsp of Black Pepper ….
  6. {Prepare 1 Tsp of Garam masala powder….
  7. {Prepare 1/4 Tsp of Baking Ppowder ….
  8. {Get 12 of Small Tomatoes ….
  9. {Prepare 12 of Small Onions ….
  10. {Get 2 ounces of Butter ….
  11. {Prepare 250 gm of For Rice:: Sela Rice ….
  12. {Prepare 1/2 Tsp of Black Cumin Seeds ….
  13. {Prepare 6 of Cloves ….
  14. {Prepare 4 of Green Cardamom ….
  15. {Get 1/4 Tsp of Yellow Food Color ….
  16. {Take 1 Tbsp of Salt ….
  17. {Prepare 1/4 Tsp of Saffron ….
  18. {Take 2 Tbsp of Butter ….

Steps to make Persian Chelo Kabab with Saffron rice:

  1. Take a chopper and Chop into it beef mince with, raw onion paste, salt, ginger, allspice, black pepper and baking powder until smooth.Give the kebab oval shape with the help of your palms.Melt butter in a pan and shallow fry kebab into it.Put the kebab on dum in the same pan by placing a coal in the centre.. Persian Chelo Kabab with Saffron rice
  2. Preheat a grill pan and roast slightly onions and tomatoes on it.
  3. Saffron Rice Preparation:Soak rice for one complete hour so that the grains may become long.Boil rice after adding yellow food color, whole spices and salt; strain the remaining water.Take a vessel and shift rice to it with butter, and saffron.Cover the rice thoroughly and let them cook over very low flame for 10 minutes...
  4. Take a platter; spread roasted onions and tomatoes into it and then spread the chelo kebab with saffron rice; serve..

So that's going to wrap this up with this special food persian chelo kabab with saffron rice recipe. Thanks so much for reading. I am sure that you can make this at home. There is gonna be more interesting food at home recipes coming up. Remember to bookmark this page on your browser, and share it to your loved ones, colleague and friends. Thanks again for reading. Go on get cooking!

Recipe of Ultimate Jalapeño chicken pasta

Recipe of Ultimate Jalapeño chicken pasta

Jalapeño chicken pasta.

Jalapeño chicken pasta

Hey everyone, it's me, Dave, welcome to our recipe site. Today, we're going to make a special dish, jalapeño chicken pasta. It is one of my favorites food recipes. For mine, I'm gonna make it a bit unique. This is gonna smell and look delicious.

Jalapeño chicken pasta is one of the most favored of current trending foods in the world. It is simple, it is fast, it tastes yummy. It is appreciated by millions daily. Jalapeño chicken pasta is something which I've loved my whole life. They're nice and they look wonderful.

To get started with this recipe, we have to first prepare a few ingredients. You can have jalapeño chicken pasta using 11 ingredients and 7 steps. Here is how you can achieve it.

The ingredients needed to make Jalapeño chicken pasta:

  1. {Prepare 4 ounces of chicken breast cubed.
  2. {Prepare 1 strip of bacon cubed.
  3. {Get 1 tbsp of low fat cream cheese.
  4. {Take 1 tbsp of Queso dip.
  5. {Prepare 2 oz of precooked red lentil penne.
  6. {Get 1/2 cup of chicken stock.
  7. {Get 1/2 ounce of chopped jalapeño pepper.
  8. {Make ready 1/2 ounce of chopped red bell pepper.
  9. {Take 1/2 ounce of chopped fresh spinach.
  10. {Prepare 1 tsp of garlic powder.
  11. {Make ready 1 tsp of onion powder.

Instructions to make Jalapeño chicken pasta:

  1. Crisp bacon over med/high in a stainless steel skillet.
  2. Add in chicken breast.
  3. Pour chicken stock in to deglaze the pan.
  4. Add in veggies and cream cheese, stir well till cream cheese melts.
  5. Add in tbsp of Queso dip.
  6. Add in cooked pasta and simmer on low heat till sauce thickens then serve.
  7. MFP information.

So that's going to wrap it up with this exceptional food jalapeño chicken pasta recipe. Thanks so much for your time. I am sure you can make this at home. There is gonna be more interesting food at home recipes coming up. Remember to save this page in your browser, and share it to your loved ones, colleague and friends. Thanks again for reading. Go on get cooking!

Simple Way to Prepare Favorite *Winter Melon Chicken Soboro Ankake*

Simple Way to Prepare Favorite *Winter Melon Chicken Soboro Ankake*

*Winter Melon Chicken Soboro Ankake*.

*Winter Melon Chicken Soboro Ankake*

Hello everybody, it is Brad, welcome to my recipe site. Today, I'm gonna show you how to make a special dish, *winter melon chicken soboro ankake*. One of my favorites food recipes. This time, I will make it a little bit tasty. This is gonna smell and look delicious.

*Winter Melon Chicken Soboro Ankake* is one of the most popular of recent trending foods on earth. It is enjoyed by millions every day. It is easy, it is fast, it tastes yummy. *Winter Melon Chicken Soboro Ankake* is something that I've loved my whole life. They are fine and they look fantastic.

To get started with this particular recipe, we have to prepare a few components. You can cook *winter melon chicken soboro ankake* using 9 ingredients and 6 steps. Here is how you cook that.

The ingredients needed to make *Winter Melon Chicken Soboro Ankake*:

  1. {Prepare of Winter melon.
  2. {Take of Ground chicken.
  3. {Prepare of ~3 teaspoons Dashi stock granules.
  4. {Take of *Sake.
  5. {Prepare of ~3 tablespoons * Usukuchi soy sauce.
  6. {Take of *Mirin.
  7. {Get of Katakuriko slurry.
  8. {Take of The juice from grated ginger.
  9. {Get of Ichimi spice.

Steps to make *Winter Melon Chicken Soboro Ankake*:

  1. Remove the seeds from the winter melons, thickly peel off the skin, and cut into large chunks..
  2. Line them up into the bottom of a pot, and add enough water to cover the winter melon. Turn on the heat, add the dashi stock, and boil..
  3. Add the ground chicken once it has come to a boil, and carefully remove any scum or grease that floats to the top. ※You could also add more dashi stock if needed..
  4. Lower the heat, add sake, soy sauce, and mirin, and boil for a little whole until the winter melon softens. ※Add soy sauce for taste..
  5. Turn up the heat, add the water dissolved katakuriko a bit at a time to thicken. Add a very small amount of ginger juice, and it is done ♪.
  6. When eating, sprinkle ichimi spice if you like. If you add boiled edamame, then the dish will become colorful *.

So that's going to wrap this up with this special food *winter melon chicken soboro ankake* recipe. Thank you very much for reading. I am sure that you will make this at home. There is gonna be more interesting food at home recipes coming up. Remember to save this page on your browser, and share it to your loved ones, friends and colleague. Thank you for reading. Go on get cooking!

Recipe of Ultimate Tailgate Ham & Cheese Sandwiches

Recipe of Ultimate Tailgate Ham & Cheese Sandwiches

Tailgate Ham & Cheese Sandwiches.

Tailgate Ham & Cheese Sandwiches

Hello everybody, hope you are having an incredible day today. Today, I will show you a way to prepare a special dish, tailgate ham & cheese sandwiches. One of my favorites. For mine, I'm gonna make it a little bit unique. This will be really delicious.

Tailgate Ham & Cheese Sandwiches is one of the most favored of current trending meals in the world. It's enjoyed by millions every day. It's simple, it's fast, it tastes yummy. Tailgate Ham & Cheese Sandwiches is something that I've loved my whole life. They're nice and they look wonderful.

To get started with this particular recipe, we must first prepare a few components. You can have tailgate ham & cheese sandwiches using 8 ingredients and 5 steps. Here is how you can achieve that.

The ingredients needed to make Tailgate Ham & Cheese Sandwiches:

  1. {Prepare 1 1/2 stick of melted butter.
  2. {Make ready 3 1/2 tbsp of horseradish sandwich spread.
  3. {Take 4 tsp of poppy seeds.
  4. {Make ready 1/4 cup of finely chopped onion.
  5. {Take 2 lb of thin sliced ham.
  6. {Make ready 24 slice of American cheese.
  7. {Make ready 24 of hamburger buns.
  8. {Take 1 of foil wrap.

Steps to make Tailgate Ham & Cheese Sandwiches:

  1. Preheat oven to 350°.
  2. Mix together first 4 ingredients and brush on each side of 24 hamburger buns..
  3. Put ham on each side of bun with cheese in between the meat..
  4. Wrap sandwiches in foil and bake for 15 to 20 minutes..
  5. After cooking, put wrapped sandwiches directly into a cooler and transport to the big game, picnic or favorite event. They stay hot and melty in the cooler until you're ready for them..

So that is going to wrap this up for this special food tailgate ham & cheese sandwiches recipe. Thanks so much for your time. I'm confident you can make this at home. There is gonna be interesting food in home recipes coming up. Remember to save this page in your browser, and share it to your family, friends and colleague. Thanks again for reading. Go on get cooking!

Recipe of Speedy Rice (அரிசி) upma

Recipe of Speedy Rice (அரிசி) upma

Rice (அரிசி) upma.

Rice (அரிசி) upma

Hello everybody, hope you are having an incredible day today. Today, I'm gonna show you how to make a distinctive dish, rice (அரிசி) upma. It is one of my favorites food recipes. For mine, I will make it a little bit unique. This is gonna smell and look delicious.

Rice (அரிசி) upma is one of the most well liked of recent trending foods on earth. It is appreciated by millions daily. It's easy, it is quick, it tastes yummy. They are fine and they look fantastic. Rice (அரிசி) upma is something which I've loved my entire life.

To begin with this particular recipe, we have to prepare a few ingredients. You can cook rice (அரிசி) upma using 16 ingredients and 6 steps. Here is how you can achieve it.

The ingredients needed to make Rice (அரிசி) upma:

  1. {Get of is 250gms.
  2. {Make ready of white rice.
  3. {Make ready of toor dal (yellow).
  4. {Get of cumin seeds.
  5. {Prepare of black peppercorns.
  6. {Make ready of Salt.
  7. {Prepare of Dry red chillies.
  8. {Make ready of black mustard.
  9. {Take of curry leaves.
  10. {Get of hing/asafoetida.
  11. {Prepare of chana dal.
  12. {Make ready of white urad dal.
  13. {Make ready of Oil.
  14. {Take of coconut oil.
  15. {Prepare of sesame oil.
  16. {Prepare of sunflower oil.

Steps to make Rice (அரிசி) upma:

  1. Measure 1 cup rice and 1 cup toor dal. Grind it coarsely. To ensure additional fragrance in the recipe, you can also dry roast the rice and dal in low flame and grind it..
  2. In the mix, throw in 3 red chillies, 1/2 sprig curry leaves, cumin seeds, black peppercorns and grind them all just for 10 seconds..
  3. Now in a heavy bottom pan; preferably steel, add in all the oils in the said quantity. Throw in mustard seeds, chana dal, urad dal, 1/2 sprig curry leaves, asafoetida, 2 red chillies. Sauté them in low flame till they turn fragrant..
  4. Then, add in 4 cups of water - preferably hot to speed up the cooking. Cover it and let the water reach a roller boil. Once it does, lower your flame to minimum; add in the salt as preferred and gently mix in the powder to the water. Make sure to stay careful as a few drops of water may splash around..
  5. Once the powder is mixed in keep stirring for a minute. Then cover and let it cook for 7 minutes in the lowest mark. Open and add water if needed. Else, give it a couple of stirs and take it off stove. It is now ready to serve..
  6. Notes: Rice brings carbs. Dals provide body building protein. Oils bring in fat. Cumin seeds help maintain body temperature while pepper, curry leaves, asafoetida and mustard help digestion. This is a wholesome meal. It can be consumed as such or with a side of chuney and sambar or; with plain whole yoghurt..

So that's going to wrap it up for this exceptional food rice (அரிசி) upma recipe. Thanks so much for reading. I'm confident that you will make this at home. There is gonna be interesting food in home recipes coming up. Don't forget to save this page on your browser, and share it to your family, friends and colleague. Thanks again for reading. Go on get cooking!

Recipe of Favorite Creamy Lemon Butter & Garlic Chicken Thighs

Recipe of Favorite Creamy Lemon Butter & Garlic Chicken Thighs

Creamy Lemon Butter & Garlic Chicken Thighs.

Creamy Lemon Butter & Garlic Chicken Thighs

Hey everyone, hope you are having an incredible day today. Today, we're going to make a distinctive dish, creamy lemon butter & garlic chicken thighs. One of my favorites. For mine, I'm gonna make it a bit tasty. This is gonna smell and look delicious.

Creamy Lemon Butter & Garlic Chicken Thighs is one of the most favored of recent trending foods on earth. It's enjoyed by millions every day. It's easy, it is quick, it tastes delicious. Creamy Lemon Butter & Garlic Chicken Thighs is something that I have loved my entire life. They're nice and they look fantastic.

To get started with this particular recipe, we must first prepare a few components. You can cook creamy lemon butter & garlic chicken thighs using 11 ingredients and 6 steps. Here is how you cook it.

The ingredients needed to make Creamy Lemon Butter & Garlic Chicken Thighs:

  1. {Take 6 of chicken thighs.
  2. {Get 1 Tbsp of paprika.
  3. {Make ready of Salt and Pepper.
  4. {Get 1 tsp of dried thyme.
  5. {Prepare 3 Tbsp of butter.
  6. {Take 3 cloves of garlic.
  7. {Prepare 1/2 cup of heavy cream.
  8. {Make ready 1 cup of chicken broth.
  9. {Get 1/4 of parmesan.
  10. {Make ready 1 of lemon.
  11. {Take 1 can of green beans OR 2 cups spinach.

Steps to make Creamy Lemon Butter & Garlic Chicken Thighs:

  1. Season chicken thighs with salt, pepper, & paprika..
  2. Melt 2 Tbsp of butter in a large skillet over medium high heat. Add chicken skin side down, and sear both sides until golden brown. Discard excess fat. And set aside chicken..
  3. Melt 1 Tbsp butter in the skillet. Add garlic, stir until fragrant, then add chicken broth, heavy cream, parmesan, lemon juice, thyme, and stir. Bring to a boil, then reduce heat to low..
  4. Add green beans, or spinach, and stir until spinach is wilted or beans are covered, and the sauce has thickened. Return chicken to the skillet..
  5. If your skillet is not oven proof, transfer to metal baking dish. Bake at 400 degrees for 25 minutes..
  6. Serve and enjoy! 😋🍽.

So that's going to wrap it up with this special food creamy lemon butter & garlic chicken thighs recipe. Thank you very much for reading. I'm confident that you will make this at home. There's gonna be interesting food at home recipes coming up. Don't forget to bookmark this page on your browser, and share it to your loved ones, colleague and friends. Thanks again for reading. Go on get cooking!

Easiest Way to Prepare Perfect Sambal Hijau Telur Goreng | Thrice
Cooked Eggs

Easiest Way to Prepare Perfect Sambal Hijau Telur Goreng | Thrice Cooked Eggs

Sambal Hijau Telur Goreng | Thrice Cooked Eggs.

Sambal Hijau Telur Goreng | Thrice Cooked Eggs

Hello everybody, it's Jim, welcome to my recipe page. Today, I will show you a way to make a distinctive dish, sambal hijau telur goreng | thrice cooked eggs. One of my favorites food recipes. This time, I will make it a little bit unique. This will be really delicious.

Sambal Hijau Telur Goreng

To begin with this recipe, we must first prepare a few components. You can cook sambal hijau telur goreng | thrice cooked eggs using 17 ingredients and 9 steps. Here is how you can achieve it.

The ingredients needed to make Sambal Hijau Telur Goreng | Thrice Cooked Eggs:

  1. {Make ready of eggs,.
  2. {Prepare of grapeseed / peanut / sunflower / canola oil, for deep frying.
  3. {Make ready of finger ginger finely minced, 1/2".
  4. {Prepare of garlic finely minced,.
  5. {Get of bay leaf,.
  6. {Make ready of star anise,.
  7. {Make ready of cinnamon stick, 1".
  8. {Prepare of cloves,.
  9. {Prepare of vegetable stock,.
  10. {Make ready of tamarind paste,.
  11. {Make ready of ShaoXing / HuaTiao wine,.
  12. {Prepare of light soy sauce,.
  13. {Make ready of sambal Hijau, 1 heaped tbsp.
  14. {Get of sea salt,.
  15. {Take of slurry, 2 tsp cornstarch + 2 TSP water.
  16. {Make ready of sesame oil,.
  17. {Get of coriander finely chopped,.

Instructions to make Sambal Hijau Telur Goreng | Thrice Cooked Eggs:

  1. Pierce the bottom of the eggs with an egg piercer. (Optional) Add 1 inch of water into a sauce pot. Bring it up to a slow simmer over low heat. Gently add the eggs into the simmering water..
  2. Cover and cook for 6 mins. Remove from heat and immediately drain and put it under running water. Add ice. Once cool enuff to handle, slowly peel the eggs. Pad the eggs dry. Add 2 inches of oil into the sauce pot or dutch oven *To check if the temperature is ready for deep frying, insert a wooden chopstick. If bubbles appear around the chopstick, the oil is ready.*.
  3. Gently add in the eggs using a spider. Flip once bottom half is golden brown. Deep fry until golden brown on all sides. *You may have to do this in batches.* Remove from and transfer into a wire cooling rack or on a plate lined with kitchen paper..
  4. Carefully drain the oil, leaving just enuff for stir frying. Add in ginger and garlic. Saute until aromatic. Add in bay leaf, star anise, cinnamon and cloves. Stir fry until aromatic. Add in vegetable stock and deglaze..
  5. Add in tamarind, ShaoXing wine, soy sauce and Sambal Hijau. Stir until well combined. Add in the fried eggs. Bring it up to a simmer. *Make sure the sauce pot is small enuff so that the eggs can submerge properly.*.
  6. In a bowl, mix cornstarch and water until smooth to create a slurry. Add that slurry into the stew. Stir until well combined. Simmer for about 3 to 5 mins or until thickened..
  7. Taste and adjust for seasoning with salt. Add in sesame oil and give it a final stir. Remove from heat..
  8. Transfer the eggs onto serving plates. Drain the stew and discard any residue. Pour the stew over the eggs. Garnish with some coriander. Serve immediately..
  9. For detailed recipe video: https://www.instagram.com/tv/COk1I_lFDXh/.

So that is going to wrap this up for this exceptional food sambal hijau telur goreng | thrice cooked eggs recipe. Thank you very much for your time. I'm confident that you will make this at home. There is gonna be interesting food in home recipes coming up. Remember to save this page on your browser, and share it to your family, colleague and friends. Thanks again for reading. Go on get cooking!

Steps to Make Any-night-of-the-week Dal Dhokli

Steps to Make Any-night-of-the-week Dal Dhokli

Dal Dhokli.

Dal Dhokli

Hello everybody, hope you're having an incredible day today. Today, I will show you a way to make a special dish, dal dhokli. One of my favorites. For mine, I'm gonna make it a little bit unique. This will be really delicious.

Dal Dhokli is one of the most popular of current trending meals in the world. It's appreciated by millions daily. It is easy, it is fast, it tastes delicious. They're nice and they look fantastic. Dal Dhokli is something that I've loved my entire life.

To get started with this recipe, we have to prepare a few ingredients. You can have dal dhokli using 25 ingredients and 10 steps. Here is how you can achieve that.

The ingredients needed to make Dal Dhokli:

  1. {Make ready of For Dal.
  2. {Prepare of Split Pegion peas (toor dal) (boiled).
  3. {Make ready of For Dhokli Dough.
  4. {Take of Multigrain Flour.
  5. {Make ready of carrom seeds.
  6. {Prepare of Turmeric Powder.
  7. {Prepare of red chilli powder.
  8. {Take of Salt.
  9. {Make ready of Oil.
  10. {Make ready of Water.
  11. {Make ready of For Dal Dhokli.
  12. {Get of oil.
  13. {Prepare of mustard seeds.
  14. {Take of asafoetida.
  15. {Prepare of Dry Chillies.
  16. {Take of red chilli powder.
  17. {Prepare of Boiled dal.
  18. {Get of Tomatoes.
  19. {Take of green chillies.
  20. {Make ready of Turmeric Powder.
  21. {Make ready of Salt.
  22. {Make ready of jaggery.
  23. {Get of water.
  24. {Get of Dhokli.
  25. {Get of pickle masala.

Instructions to make Dal Dhokli:

  1. For dough: take a kneading plate add flour, carrom seeds, salt, red chilli powder, turmeric powder, oil. Mix it..
  2. Add water and knead stiff dough. Put oil and knead it again. Keep a side..
  3. Boiled dal ready. Take a deep pan or deep kadai on medium flame. Add mustard seeds,let it crackled. Add asafoetida, dry red chilli..
  4. Add red chilli powder, water..
  5. Add boiled dal, remaining water, chopped tomatoes, green, Turmeric Powder..
  6. Add salt, jaggery. Mix it all. Let it boil..
  7. Now take dough make equal parts. Roll it on Kitchen flat surface..
  8. Get all dough balls rolled. Dal is boiling..
  9. Now cut into medium square and put all cut piece in the boiling dal..
  10. Close the lid and get dhokli cooked. Check it that dhokli is Cooked. Now add pickle masala. Mix it and serve.

So that is going to wrap it up with this exceptional food dal dhokli recipe. Thanks so much for your time. I am sure you can make this at home. There is gonna be interesting food at home recipes coming up. Don't forget to bookmark this page in your browser, and share it to your loved ones, colleague and friends. Thanks again for reading. Go on get cooking!

How to Prepare Speedy 3 spice chicken shami kabab😋

How to Prepare Speedy 3 spice chicken shami kabab😋

3 spice chicken shami kabab😋. Learn how to make Chicken Shami Kabab homemade. A delicious mixture of chicken fibers, ground chickpeas and spices. Serve them as a snack or appetizer with green chutney, lemon and onion rings.

3 spice chicken shami kabab😋 These are slightly on the heavier side and. Chicken Shami Kabab is an Indian style kabab where cooked chicken is combined with lentils and spices, shaped into a patty and shallow fried. I truly agree with you that Shami Kabab should always be of meat and not chicken.

Hello everybody, I hope you are having an amazing day today. Today, we're going to make a distinctive dish, 3 spice chicken shami kabab😋. It is one of my favorites food recipes. For mine, I am going to make it a little bit tasty. This is gonna smell and look delicious.

Learn how to make Chicken Shami Kabab homemade. A delicious mixture of chicken fibers, ground chickpeas and spices. Serve them as a snack or appetizer with green chutney, lemon and onion rings.

3 spice chicken shami kabab😋 is one of the most well liked of current trending meals in the world. It's simple, it's fast, it tastes delicious. It's appreciated by millions daily. 3 spice chicken shami kabab😋 is something that I have loved my whole life. They are fine and they look fantastic.

To get started with this particular recipe, we have to prepare a few components. You can have 3 spice chicken shami kabab😋 using 15 ingredients and 6 steps. Here is how you cook that.

The ingredients needed to make 3 spice chicken shami kabab😋:

  1. {Prepare 1 cup of yellow lentils/chana dal soaked for 4 to 6 hours.
  2. {Prepare 250 grams of chicken boneless.
  3. {Get 2 cups of water.
  4. {Prepare of salt to taste.
  5. {Make ready 12-15 of button red chillies.
  6. {Make ready 1/2 tsp of turmeric powder.
  7. {Make ready 1 of onion cut into 4 pieces.
  8. {Make ready 4-5 cloves of garlic.
  9. {Make ready 1 inch of piece of ginger.
  10. {Make ready 1/4 bunch of coriander.
  11. {Prepare 1/4 bunch of mint leaves.
  12. {Get 1 tsp of whole spice powder.
  13. {Prepare 1 of egg.
  14. {Get 4-5 of green chillies.
  15. {Get of Oil for frying.

But you will not believe that I even have a recipe for vegetable shami. Chicken shami kabab recipe, a simple and instant kabab or cutlet style of making chicken as a starter recipe by using cooked chicken paste. Do not use chicken with bones to make chicken shami. The chicken has to be pressure cooked with dry spices, garam masala and herbs.

Steps to make 3 spice chicken shami kabab😋:

  1. Add soaked daal in a pan with chicken.
  2. Add garlic (I used frozen) ginger and onion.
  3. Add water salt turmeric powder and chillies mix and let it boil then cover and cook for 45 minutes until get soft..
  4. Remove from the heat and let it cool.Then make a smooth paste in a chopper.add coriander green chillies mint egg and whole spice powder chop again..
  5. With oily hands make kababs.you can freeze these kababs for upto 3- 4 weeks..
  6. Shallow fry until golden brown then serve with mint raita or chilli garlic sauce..

One of the best chicken Shami Kabab Recipe you will find. #HappyCookingToYou. Add chicken mixture,whole spices powder,yogurt and eggs,grind until well combined. Shami Kebabs are a delicious combination of mince meat, gram lentil, and spices. It is very popular in India and Pakistan. You will get perfectly soft and delicious kababs by following it.

So that's going to wrap this up with this exceptional food 3 spice chicken shami kabab😋 recipe. Thanks so much for your time. I am sure that you can make this at home. There is gonna be more interesting food at home recipes coming up. Remember to save this page in your browser, and share it to your loved ones, colleague and friends. Thanks again for reading. Go on get cooking!

Easiest Way to Make Homemade Slow Cooker Pork Tacos

Easiest Way to Make Homemade Slow Cooker Pork Tacos

Slow Cooker Pork Tacos.

Slow Cooker Pork Tacos

Hello everybody, it is Jim, welcome to our recipe site. Today, I'm gonna show you how to make a distinctive dish, slow cooker pork tacos. One of my favorites food recipes. This time, I'm gonna make it a bit tasty. This is gonna smell and look delicious.

Slow Cooker Pork Tacos is one of the most popular of current trending foods in the world. It's simple, it is fast, it tastes yummy. It is appreciated by millions every day. They're nice and they look fantastic. Slow Cooker Pork Tacos is something which I have loved my entire life.

To get started with this recipe, we have to first prepare a few components. You can have slow cooker pork tacos using 12 ingredients and 3 steps. Here is how you can achieve it.

The ingredients needed to make Slow Cooker Pork Tacos:

  1. {Take of Pork Shoulder (bone in preferred).
  2. {Get of Beef Broth.
  3. {Take of water.
  4. {Make ready of Large Onions (quartered or julienne).
  5. {Get of Poblano peppers (julienne).
  6. {Take of Jalapenos (diced).
  7. {Get of Parsley.
  8. {Make ready of Basil.
  9. {Get of Knorr Chicken Bouillon.
  10. {Take of Queso fresco.
  11. {Prepare of Mexican sour cream.
  12. {Get of Corn Tortillas (flour if preferred).

Steps to make Slow Cooker Pork Tacos:

  1. Put pork shoulder in roaster. Add all other ingredients. Set roaster to 225 degrees..
  2. After cooking for 12.5 hours shred for tacos..
  3. When plating put meat first followed by Onions and Poblanos. Gently squeeze taco at this point to remove juice (trust me even after that you will still bathe in it). Then add Queso Fresco. Drizzle Mexican Sour Cream. Top with Parsley.

So that is going to wrap it up for this special food slow cooker pork tacos recipe. Thank you very much for reading. I am confident that you will make this at home. There's gonna be interesting food in home recipes coming up. Remember to save this page on your browser, and share it to your loved ones, colleague and friends. Thanks again for reading. Go on get cooking!

Recipe of Quick Jalapeño Popper Soup

Recipe of Quick Jalapeño Popper Soup

Jalapeño Popper Soup.

Jalapeño Popper Soup

Hey everyone, it is me, Dave, welcome to my recipe site. Today, I'm gonna show you how to prepare a special dish, jalapeño popper soup. One of my favorites food recipes. For mine, I am going to make it a bit unique. This will be really delicious.

Jalapeño Popper Soup is one of the most popular of current trending foods in the world. It is simple, it's fast, it tastes yummy. It is appreciated by millions daily. They're nice and they look fantastic. Jalapeño Popper Soup is something which I've loved my entire life.

To begin with this particular recipe, we must prepare a few components. You can have jalapeño popper soup using 16 ingredients and 5 steps. Here is how you can achieve it.

The ingredients needed to make Jalapeño Popper Soup:

  1. {Make ready 3 of large chicken breasts, cut into bite size chunks.
  2. {Make ready 1 of red bell pepper, chopped.
  3. {Take 1 of small onion, chopped.
  4. {Prepare 4 of jalapeños, chopped (remove seeds for not so hot, leave seeds in if you like the heat).
  5. {Get 2 cans of great northern beans, drained.
  6. {Prepare 1 can of corn, drained.
  7. {Prepare 1 can of petite diced tomatoes.
  8. {Take 4 cups of chicken stock.
  9. {Take 1 pkg of cream cheese.
  10. {Take 1 tsp. of cumin.
  11. {Prepare 1 tsp. of chili powder.
  12. {Make ready 1 tsp. of garlic powder.
  13. {Make ready 1/2 tsp. of red pepper (less if you dont want so much heat).
  14. {Take 1/2 tsp. of pepper.
  15. {Take 1/4 tsp. of salt.
  16. {Make ready of Optional toppings for serving: shredded cheddar cheese, green onions, sour cream, bacon.

Steps to make Jalapeño Popper Soup:

  1. Place chicken chunks in a large pot with a little bit of vegetable oil and add all seasonings; saute on medium high heat..
  2. Once chicken is half way cooked (still see some pink), add in red bell pepper, onion and jalapeño..
  3. Continue to saute until chicken is thoroughly cooked..
  4. Add in the chicken stock, corn, northern beans and tomatoes and simmer over medium heat for 15 minutes..
  5. Add in the cream cheese in chunks and continue to simmer until cream cheese is completely melted and blended in. Serve with toppings of choice. Enjoy!.

So that's going to wrap this up with this exceptional food jalapeño popper soup recipe. Thank you very much for reading. I'm sure that you can make this at home. There's gonna be interesting food at home recipes coming up. Remember to save this page in your browser, and share it to your family, friends and colleague. Thank you for reading. Go on get cooking!

Recipe of Quick Simple Meatballs Soup

Recipe of Quick Simple Meatballs Soup

Simple Meatballs Soup.

Simple Meatballs Soup

Hey everyone, hope you're having an incredible day today. Today, I'm gonna show you how to make a distinctive dish, simple meatballs soup. One of my favorites. This time, I am going to make it a little bit unique. This is gonna smell and look delicious.

Simple Meatballs Soup is one of the most popular of current trending foods in the world. It is easy, it is fast, it tastes yummy. It's appreciated by millions daily. They're nice and they look fantastic. Simple Meatballs Soup is something that I've loved my entire life.

To begin with this particular recipe, we have to first prepare a few ingredients. You can have simple meatballs soup using 9 ingredients and 4 steps. Here is how you can achieve it.

The ingredients needed to make Simple Meatballs Soup:

  1. {Get 500 gr of ground beef.
  2. {Take 3-4 tbsp of katakuriko (you can substitute it with corn starch or sago flour).
  3. {Get 1 tbsp of onion paste (or grated onion).
  4. {Make ready 1 tbsp of garlic paste (or grated garlic).
  5. {Prepare of Crushed black pepper to your preference.
  6. {Prepare 1 of egg.
  7. {Make ready 1/2 tsp of celery salt.
  8. {Take 1/4 cup of frozen peas.
  9. {Prepare 2 cups of beef broth.

Instructions to make Simple Meatballs Soup:

  1. Boil beef broth in pot..
  2. Mix everything except beef broth and frozen peas. Knead with your hand until the mixture is pliable..
  3. After the broth boils, form balls and put inside the pot. After the meatballs are cooked (they'll float a bit), add frozen peas..
  4. Stir now and then and give it a taste. I usually do not add salt at this stage, but if it feels too plain, add more salt (or celery salt) and crushed black pepper..

So that's going to wrap this up for this special food simple meatballs soup recipe. Thank you very much for your time. I am sure that you will make this at home. There's gonna be interesting food in home recipes coming up. Remember to save this page on your browser, and share it to your family, colleague and friends. Thank you for reading. Go on get cooking!

Recipe of Award-winning Student pasta

Recipe of Award-winning Student pasta

Student pasta. Cheap and hopefully fool proof, you can cook up these pasta dishes for either just yourself or for your whole flat. Pasta is a student staple: It's cheap, lasts forever in the cupboard and is (almost) fool-proof to cook. Here are some very easy ways to make it super tasty that even the most novice of student cooks can.

Student pasta With so many shapes and sizes, pasta makes a wonderful and educational tool that can be incorporated into learning activities for students of all ages. Pasta's the go-to student meal for many reasons - and these cheap, easy and (most importantly) tasty recipes are ideal, whatever the occasion. Tangy tomato pasta sauce with a delicious sausage pieces.

Hey everyone, hope you are having an amazing day today. Today, I will show you a way to make a special dish, student pasta. It is one of my favorites. For mine, I will make it a little bit tasty. This will be really delicious.

Student pasta is one of the most favored of current trending foods on earth. It is easy, it is quick, it tastes yummy. It is enjoyed by millions every day. They are nice and they look fantastic. Student pasta is something which I've loved my whole life.

Cheap and hopefully fool proof, you can cook up these pasta dishes for either just yourself or for your whole flat. Pasta is a student staple: It's cheap, lasts forever in the cupboard and is (almost) fool-proof to cook. Here are some very easy ways to make it super tasty that even the most novice of student cooks can.

To get started with this recipe, we have to prepare a few ingredients. You can have student pasta using 8 ingredients and 5 steps. Here is how you cook it.

The ingredients needed to make Student pasta:

  1. {Make ready of Spaghetti.
  2. {Prepare of Water.
  3. {Take Can of tuna in oil.
  4. {Get of Several cloves of garlic, sliced.
  5. {Take A few of tomato pieces.
  6. {Prepare 1 of jalapeno, diced.
  7. {Take of Extra virgin olive oil.
  8. {Take of Vinho verde.

Most relevant Best selling Latest uploads. Make this simple student pasta and tomato dish for a delicious, filling and budget-friendly supper. It is a great way to use up simple storecupboard ingredients. Everyone loves a good pasta dish, so if you're wanting to add some pizzazz to a basic meal, we've got your back with these essential recipes for students.

Instructions to make Student pasta:

  1. Prepare ingredients, mise en place.
  2. Boil spaghetti (6 minutes) and saute vegetables except tomatoes..
  3. Add tuna and tomatoes and more olive oil..
  4. Add pasta, al diente, to pan first with a touch of vinho verde, then some small amount of pasta water. Cook until water is sufficiently absorbed, say 5 minutes..
  5. Plate. Drizzle on some more oil. Enjoy!.

When it comes to cooking while in college, cheap pasta dishes are the way to go. Cooking can not only be unfamiliar territory for college students but also it can become expensive especially if you're a. A hearty pasta dish that any student will appreciate before an all-nighter. Instead of tinned sweetcorn you can use tinned mushrooms or peas. Sign up and discover Pasta Evangelists deliver fresh, restaurant-quality pasta recipe boxes across the UK, so you can.

So that's going to wrap it up for this special food student pasta recipe. Thanks so much for reading. I am confident you can make this at home. There's gonna be interesting food at home recipes coming up. Don't forget to bookmark this page on your browser, and share it to your loved ones, friends and colleague. Thanks again for reading. Go on get cooking!

Recipe of Super Quick Homemade Baked chicken with apricot jam, sage,
and lemon zest

Recipe of Super Quick Homemade Baked chicken with apricot jam, sage, and lemon zest

Baked chicken with apricot jam, sage, and lemon zest.

Baked chicken with apricot jam, sage, and lemon zest

Hey everyone, I hope you are having an incredible day today. Today, I will show you a way to prepare a special dish, baked chicken with apricot jam, sage, and lemon zest. It is one of my favorites. For mine, I am going to make it a bit unique. This will be really delicious.

Baked chicken with apricot jam, sage, and lemon zest is one of the most well liked of recent trending meals in the world. It's appreciated by millions every day. It is simple, it is fast, it tastes delicious. They are fine and they look wonderful. Baked chicken with apricot jam, sage, and lemon zest is something which I've loved my whole life.

To begin with this particular recipe, we have to first prepare a few components. You can cook baked chicken with apricot jam, sage, and lemon zest using 9 ingredients and 3 steps. Here is how you can achieve it.

The ingredients needed to make Baked chicken with apricot jam, sage, and lemon zest:

  1. {Make ready 1 of 3 1/2- to 4-pound chicken, cut into 8 pieces, patted dry with paper towels.
  2. {Prepare 1 1/4 tsp of coarse kosher salt.
  3. {Get 3/4 tsp of Freshly grated ground black pepper.
  4. {Get 5 of sprigs fresh sage.
  5. {Make ready 3 tbsp of extra virgin oil.
  6. {Make ready 1 of lemon, zested and juiced.
  7. {Get 1/3 cup of apricot jam, large chunks cut up.
  8. {Take 1 tsp of Worcestershire sauce.
  9. {Take 1 large of clove garlic, minced.

Steps to make Baked chicken with apricot jam, sage, and lemon zest:

  1. Massage the chicken pieces with salt and pepper. Add sage and olive oil and mix well. Let marinate for 6 hours or overnight.
  2. Preheat oven to 400°F. Add zest and juice to a small bowl and mix with jam, worcestershire sauce, and garlic.
  3. Pluck out the sage from the chicken and rub jam mixture all over chicken. Lay them in a 9X13 baking dish, leaving plenty of breathing room between each piece. Bake for 45-55 minutes, until skin is golden and juices run clear.

So that is going to wrap this up with this exceptional food baked chicken with apricot jam, sage, and lemon zest recipe. Thanks so much for reading. I'm sure you can make this at home. There is gonna be interesting food at home recipes coming up. Remember to bookmark this page in your browser, and share it to your family, friends and colleague. Thank you for reading. Go on get cooking!

How to Prepare Quick Salsa chicken enchiladas my way

How to Prepare Quick Salsa chicken enchiladas my way

Salsa chicken enchiladas my way.

Salsa chicken enchiladas my way

Hey everyone, it's Drew, welcome to my recipe site. Today, I'm gonna show you how to make a special dish, salsa chicken enchiladas my way. One of my favorites food recipes. For mine, I will make it a little bit unique. This will be really delicious.

Salsa chicken enchiladas my way is one of the most favored of recent trending foods in the world. It is simple, it is fast, it tastes delicious. It is appreciated by millions daily. Salsa chicken enchiladas my way is something that I've loved my whole life. They are nice and they look fantastic.

To begin with this recipe, we must first prepare a few components. You can have salsa chicken enchiladas my way using 17 ingredients and 10 steps. Here is how you can achieve that.

The ingredients needed to make Salsa chicken enchiladas my way:

  1. {Take of sour cream.
  2. {Make ready of cream cheese softened.
  3. {Make ready of mild salsa.
  4. {Prepare of red enchilada sauce.
  5. {Make ready of can diced green chiles.
  6. {Get of taco cheese blend.
  7. {Take of McCormick fajita seasoning mix.
  8. {Get of salt, pepper and garlic powder.
  9. {Make ready of Vegetable or olive oil.
  10. {Make ready of chicken breasts.
  11. {Make ready of mild verda salsa.
  12. {Take of green enchilada sauce.
  13. {Make ready of corn (optional).
  14. {Take of black beans rinsed and drained (optional).
  15. {Get of mission flour tortillas soft taco size.
  16. {Prepare of Dried Cilantro.
  17. {Make ready of Extra Sour cream or salsa for topping.

Instructions to make Salsa chicken enchiladas my way:

  1. Pre heat oven to 375 degrees.
  2. Coat chicken in a little oil and coat in fajita seasoning, little salt, pepper and garlic powder and bake or air fry till done and dice up.
  3. Heat and lightly brown each tortilla in a dry hot skillet for 10 to 15 seconds on each side and stack and wrap up in foil.
  4. Spray two 13×9 inch baking dishes with cooking oil and add 1/2 cup salsa verda to the bottom of eash dish.
  5. Mix 1/2 cup sour cream, 1/2 cup salsa, 1/2 cup red enchilada sauce, 1/2 block cream cheese and green chiles..
  6. Mix in chicken and 1 cup of cheese. At this time if you want add in black beans and corn.
  7. Fill tortillas with filling about 1/3 cup filling and roll up and.
  8. Place seem side down and mix 1/2 cup of salsa verda and 1/2 cup green enchilada sauce and pour on top and spread out and sprinkle on 1 1/2 cups of cheese on each dish lightly sprinkle on cilantro.
  9. Bake uncovered for 35 minutes.
  10. Top with sour cream and a little salsa if wanted and enjoy !.

So that's going to wrap it up with this special food salsa chicken enchiladas my way recipe. Thank you very much for your time. I am sure you can make this at home. There's gonna be more interesting food in home recipes coming up. Remember to bookmark this page in your browser, and share it to your loved ones, friends and colleague. Thanks again for reading. Go on get cooking!

Steps to Prepare Award-winning Japanese-Western Fusion Fat California
Rolls with Kombu Seaweed

Steps to Prepare Award-winning Japanese-Western Fusion Fat California Rolls with Kombu Seaweed

Japanese-Western Fusion Fat California Rolls with Kombu Seaweed.

Japanese-Western Fusion Fat California Rolls with Kombu Seaweed

Hey everyone, hope you're having an amazing day today. Today, I'm gonna show you how to prepare a distinctive dish, japanese-western fusion fat california rolls with kombu seaweed. One of my favorites food recipes. This time, I will make it a bit tasty. This is gonna smell and look delicious.

Japanese-Western Fusion Fat California Rolls with Kombu Seaweed is one of the most popular of recent trending foods on earth. It is simple, it's fast, it tastes yummy. It's enjoyed by millions daily. They're fine and they look wonderful. Japanese-Western Fusion Fat California Rolls with Kombu Seaweed is something which I have loved my whole life.

To begin with this particular recipe, we have to prepare a few components. You can cook japanese-western fusion fat california rolls with kombu seaweed using 22 ingredients and 8 steps. Here is how you cook it.

The ingredients needed to make Japanese-Western Fusion Fat California Rolls with Kombu Seaweed:

  1. {Make ready 1000 grams of Uncooked white rice.
  2. {Prepare 6 of sheets Toasted nori seaweed.
  3. {Take 3 cm of Kombu.
  4. {Get 1 tbsp of each Sake and mirin.
  5. {Get of The fillings:.
  6. {Get 1 of Carrot.
  7. {Prepare 2 of Avocado.
  8. {Make ready 3 of Eggs.
  9. {Make ready 1 of Cucumber.
  10. {Get 7 stick of Imitation crab sticks.
  11. {Make ready 3 tsp of Sugar (For the rolled omelette).
  12. {Take of Sushi rice:.
  13. {Take 150 ml of ◎Sushi vinegar or regular vinegar.
  14. {Get 1 pinch of ◎Salt.
  15. {Get 1 of ◎White sesame seeds.
  16. {Make ready of Sweet and salty simmered carrots:.
  17. {Take 1 tsp of ▲Dashi stock granules.
  18. {Take 1 tbsp of ▲Mirin.
  19. {Get 3 tbsp of ▲Sugar.
  20. {Get 3 tbsp of ▲Soy sauce.
  21. {Get 2 tbsp of ▲Sake.
  22. {Prepare 1 of Sushi vinegar (to keep from sticking to your hands).

Instructions to make Japanese-Western Fusion Fat California Rolls with Kombu Seaweed:

  1. Add 1 tablespoon each of sake and mirin to the rice, pour a little less water than usual to make hard rice, lay the konbu kelp on top, and cook! (photo above is what it looks like after cooking)..
  2. Prepare the ingredients. Cut the carrots into 1cm thick sticks, and boil in a bit of water with the ▲ ingredients to flavor. Turn off the heat once the water content has mostly evaporated, and let cool..
  3. Add 3 teaspoons of sugar to the eggs and make an omelette (If you make it as long as the length of the seaweed, then there will be no waste). Cut into about 1 cm thick strips after it has cooled..
  4. Use a ripen avocado. Cut in half with a knife, and twist apart with your hands as shown in the photo. Cut into lengthwise strips..
  5. Cut the cucumber 1cm thick, sprinkle with salt, and let sit for a while for the water to seep out. Wipe the water from the surface before using. Tear the imitation crab by hand..
  6. Make the sushi rice. Boil vinegar and salt into a small saucepan, and immediately turn off the heat after bringing to a boil. Add the vinegar to the rice, and mix together as if cutting the rice. Then, fan it down until it cools. Sprinkle white sesame and mix, and the sushi rice is ready..
  7. Leaving about 1 cm at the opening and about 3 cm at the end of the nori seaweed open, thinly spread out the rice, coat your hands in sushi vinegar, and flatten it all out evenly while pressing down on it with your hands. Lay the ingredients, and roll it up. Place the roll wrap-side down, and cut after letting it sit for a while..
  8. Here's an inside-out version of the rolls..

So that's going to wrap it up for this special food japanese-western fusion fat california rolls with kombu seaweed recipe. Thank you very much for your time. I'm sure you will make this at home. There's gonna be more interesting food at home recipes coming up. Remember to bookmark this page in your browser, and share it to your family, colleague and friends. Thank you for reading. Go on get cooking!

Simple Way to Make Perfect Creamy butter garlic lemon chicken

Simple Way to Make Perfect Creamy butter garlic lemon chicken

Creamy butter garlic lemon chicken.

Creamy butter garlic lemon chicken

Hey everyone, hope you're having an amazing day today. Today, we're going to make a distinctive dish, creamy butter garlic lemon chicken. One of my favorites. For mine, I am going to make it a little bit unique. This will be really delicious.

Creamy butter garlic lemon chicken is one of the most favored of recent trending meals in the world. It's easy, it's fast, it tastes yummy. It is appreciated by millions daily. They are nice and they look fantastic. Creamy butter garlic lemon chicken is something which I have loved my entire life.

To begin with this particular recipe, we have to first prepare a few components. You can have creamy butter garlic lemon chicken using 18 ingredients and 6 steps. Here is how you cook it.

The ingredients needed to make Creamy butter garlic lemon chicken:

  1. {Get 4 pieces of chicken thighs(1 used 3,it's all I had left😁).
  2. {Prepare 2 of large tomatoes pureed.
  3. {Prepare 4 of large pre-boiled cubed potatoes (optional).
  4. {Take 1/2 cup of water.
  5. {Prepare 1/2 cup of milk full fat milk.
  6. {Prepare 1 of capsicum (green bell pepper) diced.
  7. {Take 1/2 cup of cilantro/Corriander.
  8. {Take 1 of small carrot thinly sliced.
  9. {Make ready 1 tsp of turmeric powder.
  10. {Make ready 1 tsp of black pepper.
  11. {Take 1 pinch of salt to taste.
  12. {Prepare 2 tbsp of dark soy sauce.
  13. {Prepare 2 tsp of zest of a lemon.
  14. {Prepare 4 tbsp of butter.
  15. {Prepare 2 tsp of garlic paste.
  16. {Make ready 1 tsp of ginger paste.
  17. {Make ready 1 of large onion.
  18. {Make ready of Juice of half a lemon.

Instructions to make Creamy butter garlic lemon chicken:

  1. Frist we marinate our chicken. In a bowl, add the soy sauce, salt 1 tsp lemon zest, 1 tsp garlic paste, salt, black pepper, and turmeric powder. Mix well then add the chicken, allow to sit for about 10-15 minutes.
  2. After 15 minutes, add 2 tbsp of butter in a pan over medium heat, add the chicken pieces and allow each side to cook for about 5 minutes. Remove and set aside. Do not dispose off the remaining marinade. We'll use it in the sauce.
  3. In the pan, add the remaining 2 tbsp of butter, add in your onions, and stir for about 2 minutes untill they start to caramelize, add in green bell pepper, carrots, garlic and ginger and sauté. Cover and allow to cook stirring occasionally for 2-3 minutes. Add the pureed tomatoes,remaining lemon zest and some salt the cover and allow to cook 2 minutes..
  4. Add in your chicken, if you opt for potatoes like me, this is when you put them in, then squeeze in the juice of half a lemon, add the remaining black pepper and turmeric powder, mix and let cook for a minute then add water. Let cook for 3-4minutes.
  5. Finally add milk and cilantro,mix then cover and allow to cook for 5 minute switch off your heat..
  6. Bon Appétit.

So that's going to wrap this up for this exceptional food creamy butter garlic lemon chicken recipe. Thank you very much for your time. I am confident you can make this at home. There is gonna be interesting food at home recipes coming up. Don't forget to save this page in your browser, and share it to your family, colleague and friends. Thanks again for reading. Go on get cooking!

Easiest Way to Prepare Speedy Poori (Puri)-Indian Breads

Easiest Way to Prepare Speedy Poori (Puri)-Indian Breads

Poori (Puri)-Indian Breads.

Poori (Puri)-Indian Breads

Hello everybody, hope you are having an incredible day today. Today, I will show you a way to make a special dish, poori (puri)-indian breads. One of my favorites. For mine, I will make it a bit unique. This is gonna smell and look delicious.

Poori (Puri)-Indian Breads is one of the most favored of recent trending meals in the world. It is simple, it is fast, it tastes delicious. It's enjoyed by millions daily. They're nice and they look fantastic. Poori (Puri)-Indian Breads is something that I've loved my entire life.

To get started with this particular recipe, we have to first prepare a few components. You can cook poori (puri)-indian breads using 4 ingredients and 10 steps. Here is how you cook it.

The ingredients needed to make Poori (Puri)-Indian Breads:

  1. {Prepare 1 cup of Whole Wheat Flour (Chapati Atta).
  2. {Get of as required Salt.
  3. {Get 1 tsp of Oil + More for Deep Frying.
  4. {Make ready 1/4 cup of + 2 tbsp Water.

Steps to make Poori (Puri)-Indian Breads:

  1. Add a teaspoon of oil and mix well with your fingertips, so that everything is incorporated well..
  2. Now add little water at a time and start kneading the dough. It should be smooth and tight. Not soft like roti or chapati dough..
  3. Cover the dough and let it rest for 15 minutes. After resting time, knead the dough once again to smooth out..
  4. Divide the dough into 12 equal sized portions. Make smooth ball out of it..
  5. Flatten it out between your palm and make disc. Keep the discs covered with kitchen towel so that they don't dry out..
  6. Now using rolling pin and rolling board, make 2-3 inch diameter circle. It should not be too thin or too thick. Never use dry flour while rolling as a dusting..
  7. Roll few pooris and keep them in a plate, covered with kitchen towel..
  8. Heat oil in a pan on medium heat. Once hot, slide one poori into the hot oil. By very gentle pressing using back of spatula, fry them. It will help poori to puff up..
  9. As it puffs up and bottom side is light brown, meaning no more bubbles in the oil, then flip it..
  10. Fry the other side until light golden brown in colour. Remove it from the oil and place on paper towel lined plate. Fry all the pooris in the same way and serve. Best served fresh..

So that is going to wrap it up for this special food poori (puri)-indian breads recipe. Thanks so much for reading. I am sure that you will make this at home. There's gonna be more interesting food in home recipes coming up. Remember to save this page on your browser, and share it to your loved ones, colleague and friends. Thanks again for reading. Go on get cooking!

Simple Way to Prepare Super Quick Homemade Arhar dal ki khichdi

Simple Way to Prepare Super Quick Homemade Arhar dal ki khichdi

Arhar dal ki khichdi.

Arhar dal ki khichdi

Hello everybody, hope you are having an amazing day today. Today, we're going to prepare a special dish, arhar dal ki khichdi. It is one of my favorites. For mine, I am going to make it a bit tasty. This is gonna smell and look delicious.

Arhar dal ki khichdi is one of the most favored of current trending foods in the world. It is enjoyed by millions every day. It is easy, it's quick, it tastes delicious. Arhar dal ki khichdi is something which I have loved my whole life. They're nice and they look wonderful.

To get started with this particular recipe, we have to first prepare a few components. You can have arhar dal ki khichdi using 14 ingredients and 6 steps. Here is how you cook it.

The ingredients needed to make Arhar dal ki khichdi:

  1. {Get of arhar dal (toor dal).
  2. {Take of rice.
  3. {Make ready of chopped tomato.
  4. {Get of potato cut in cubes.
  5. {Take of dried red chilli.
  6. {Prepare of chopped green chillies.
  7. {Make ready of grated ginger.
  8. {Make ready of chopped coriander leaves.
  9. {Make ready of hing.
  10. {Take of turmeric powder.
  11. {Make ready of cumin seeds.
  12. {Take of ghee.
  13. {Take of salt.
  14. {Prepare of water or as required.

Steps to make Arhar dal ki khichdi:

  1. First collects all ingredients. Wash dal and rice properly..
  2. Heat 2 tbsp ghee in a cooker,add cumin seeds, hing, ginger and green chillies on low flame. Mix well..
  3. Add dal, rice, mix well..
  4. Add potato, tomato, turmeric powder and salt.Mix well..
  5. Add water, mix well. Cover with the lid. Cook on low medium flame for one whistles. Turn off the flame. Let it cool down. Now open the lid, add chopped coriander leaves..
  6. For tadka--Take a small pan, heat 1tbsp ghee, cumin seeds, hing and red chilli, when crackles, turn off the flame, pour over the khichdi. Arhar dal ki khichdi is ready to serve with curd, papad and salad. Enjoy!!!.

So that's going to wrap it up for this special food arhar dal ki khichdi recipe. Thank you very much for reading. I am sure that you can make this at home. There's gonna be more interesting food at home recipes coming up. Remember to save this page in your browser, and share it to your loved ones, colleague and friends. Thank you for reading. Go on get cooking!