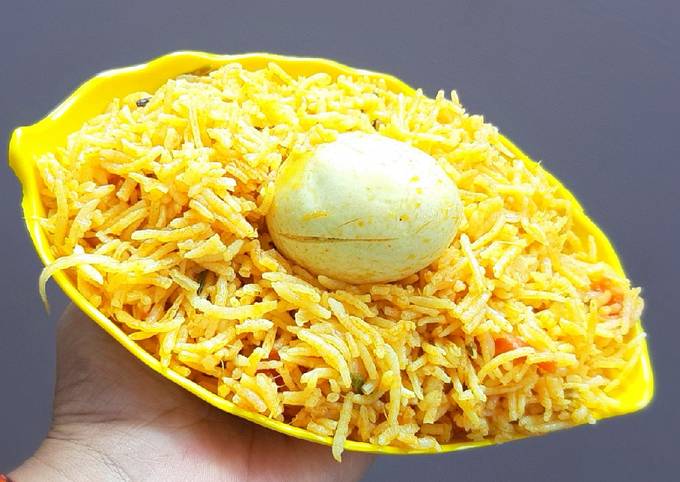
Recipe of Quick Egg biriyani

Recipe of Quick Egg biriyani

Egg biriyani.

Egg biriyani

Hello everybody, I hope you're having an amazing day today. Today, I will show you a way to make a distinctive dish, egg biriyani. It is one of my favorites. For mine, I'm gonna make it a little bit tasty. This is gonna smell and look delicious.

Egg biriyani is one of the most popular of current trending meals in the world. It is simple, it's quick, it tastes yummy. It is appreciated by millions every day. They're fine and they look wonderful. Egg biriyani is something which I have loved my whole life.

To get started with this recipe, we must first prepare a few components. You can have egg biriyani using 19 ingredients and 7 steps. Here is how you can achieve that.

The ingredients needed to make Egg biriyani:

  1. {Get 5 of eggs.
  2. {Take 1 cup of rice.
  3. {Make ready 1 tablespoon of ginger garlic paste.
  4. {Get 1/4 of cinnamon and clove powder.
  5. {Make ready 1 of Bay leaf.
  6. {Prepare 2 of kopak pod.
  7. {Make ready 1 inch of cinnamon.
  8. {Prepare 4 of clove.
  9. {Get 2 of onion.
  10. {Prepare 2 of tomato.
  11. {Take 2 of Green chillies.
  12. {Make ready 1/4 teaspoon of turmeric powder.
  13. {Take 1 tablespoon of chilli powder.
  14. {Take 1 tablespoon of coriander powder.
  15. {Get 1handful of Coriander leaves.
  16. {Make ready 1 handful of mint leaves.
  17. {Get 3 tablespoon of ghee.
  18. {Prepare 3 tablespoon of oil.
  19. {Prepare To taste of Salt.

Steps to make Egg biriyani:

  1. Boil eggs for 10 minutes peel and make slight cuts on it..
  2. In a cooker heat oil and ghee, add ginger garlic paste, cinnamon, clove, bay leaf, kopak pod, slit green chillies and fry till raw smell goes off..
  3. Add onions fry till translucent..
  4. Add chilli powder, coriander powder, turmeric, cinnamon and clove powder. Add eggs and mix well. Add tomatoes and salt..
  5. After tomatoes are cooked add washed rice..
  6. Add 1. 3/4 cup of water, add coriander leaves and mint leaves. Cover lid and cook for 1 whistle..
  7. Serve hot with kurma or curd raita..

So that's going to wrap this up with this exceptional food egg biriyani recipe. Thanks so much for your time. I'm confident you will make this at home. There is gonna be more interesting food at home recipes coming up. Don't forget to bookmark this page on your browser, and share it to your family, colleague and friends. Thanks again for reading. Go on get cooking!

Recipe of Speedy Fitness protein smoothie

Recipe of Speedy Fitness protein smoothie

Fitness protein smoothie. So how should you make a healthy, protein-packed smoothie? Start by using roughly one cup of fruit per smoothie. Get lean and strong with the ultimate list of protein shakes and smoothies.

Fitness protein smoothie Start your day with these protein smoothies and luxuriate in what tastes like thick, velvety milkshakes! If you're stuck in a smoothie rut, adding the same old ingredients to your blender time and time again. This high protein smoothie will indeed be a treat for both men & women post their intense workout.

Hey everyone, hope you are having an incredible day today. Today, we're going to make a distinctive dish, fitness protein smoothie. One of my favorites food recipes. This time, I'm gonna make it a bit tasty. This will be really delicious.

Fitness protein smoothie is one of the most well liked of recent trending foods in the world. It is easy, it is quick, it tastes yummy. It's appreciated by millions daily. Fitness protein smoothie is something that I have loved my entire life. They are nice and they look wonderful.

So how should you make a healthy, protein-packed smoothie? Start by using roughly one cup of fruit per smoothie. Get lean and strong with the ultimate list of protein shakes and smoothies.

To get started with this particular recipe, we have to first prepare a few ingredients. You can have fitness protein smoothie using 6 ingredients and 1 steps. Here is how you cook it.

The ingredients needed to make Fitness protein smoothie:

  1. {Take 30 g of vanilla whey protein.
  2. {Get 30 g of chia seeds.
  3. {Take 100 g of frozen banana.
  4. {Make ready 100 g of frozen strawberry.
  5. {Take 100 g of frozen blueberry.
  6. {Prepare 300 ml of milk.

It will give you a boost of energy that you require for. Purposefully blended with protein-rich ingredients to help you fuel up or recover faster. Protein smoothies are simple enough—add some Greek yogurt, cottage cheese, or inexpensive whey protein to your favorite smoothie ingredients, and you're covered. Protein is essential for your body.

Instructions to make Fitness protein smoothie:

  1. Put everything in blender and mix well. Frozen fruit and chia seeds will give it a thick ice cream like consistency..

These fruity High Protein Smoothies for Weight Loss will keep you stay full and energized while helping you reach your weight loss goals. If you've started working out more seriously. High-protein shakes and smoothies are pretty much the perfect on-the-go breakfast: Fast, easy, and portable. "It's simple to add protein to a smoothie without using protein powder," says Rumsey. This Tropical Smoothie recipe is a cool and creamy smoothie drink filled with tropical flavors. Learn how to make protein smoothies using whole foods.

So that is going to wrap this up with this special food fitness protein smoothie recipe. Thank you very much for reading. I am confident that you will make this at home. There's gonna be more interesting food at home recipes coming up. Remember to bookmark this page in your browser, and share it to your family, friends and colleague. Thank you for reading. Go on get cooking!

Steps to Prepare Award-winning Stroganoff Tortellini

Steps to Prepare Award-winning Stroganoff Tortellini

Stroganoff Tortellini. Recipe courtesy of Food Network Kitchen. Fügen Sie die Tortellini hinzu und kochen Sie, wie. Mushroom Cream Sauce Recipe with Tortellini.

Stroganoff Tortellini Serve with garlic bread and a salad. Beef stroganoff was like chewing on leather. Beef Stroganoff or Beef Stroganov (Russian: бефстроганов, tr. befstróganov) is a Russian dish of sautéed pieces of beef served in a sauce with smetana (sour cream).

Hello everybody, it's Jim, welcome to our recipe page. Today, I'm gonna show you how to prepare a special dish, stroganoff tortellini. One of my favorites food recipes. This time, I'm gonna make it a little bit unique. This is gonna smell and look delicious.

Stroganoff Tortellini is one of the most favored of recent trending foods in the world. It is easy, it's quick, it tastes delicious. It is appreciated by millions daily. Stroganoff Tortellini is something that I've loved my whole life. They are fine and they look wonderful.

Recipe courtesy of Food Network Kitchen. Fügen Sie die Tortellini hinzu und kochen Sie, wie. Mushroom Cream Sauce Recipe with Tortellini.

To begin with this particular recipe, we have to prepare a few ingredients. You can cook stroganoff tortellini using 11 ingredients and 4 steps. Here is how you cook that.

The ingredients needed to make Stroganoff Tortellini:

  1. {Get 1 package of Tortellini (19 oz).
  2. {Get 1 lb of ground beef.
  3. {Prepare 1 cup of chopped onion.
  4. {Prepare 8 oz of sliced mushrooms.
  5. {Get 3 cloves of minced garlic.
  6. {Get 3 tbsp of all-purpose flour.
  7. {Take 1 can of beef broth.
  8. {Get 1 carton of sour cream (8 oz).
  9. {Get 1 package of shredded mozzerella cheese (8 oz).
  10. {Get of Sides.
  11. {Prepare of Broccoli.

Cheese Tortellini, Stroganoff Sauce, Prime Rib, Mushrooms, Grape Tomatoes, Scallions. Keyword Rehberi Kayıtları (creamy chicken stroganoff - creamy chicken tortellini soup). Liver Stroganoff in the collection of dishes of Russian cuisine. Description of the recipe with step by Beef stroganoff has a second name: Stroganoff-style beef.

Steps to make Stroganoff Tortellini:

  1. Cook Tortellini noodles, drain, and keep warm..
  2. Meanwhile, cook beef, mushrooms, onion, and garlic in skillet over med/high heat until beef is browned. Drain and return to skillet..
  3. Add flour, stirring constantly for 2 minutes. Gradually add beef broth and cook until thickened..
  4. Stir in sour cream and Tortellini, top with cheese, cover, and cook until cheese is melted..

These are pieces of beef, first fried and. Tortellini Recipes Pasta Dinner Recipes Cheese Tortellini Creamed Mushrooms Stuffed Mushrooms Stuffed Peppers Mushroom Stroganoff Beef Stroganoff Veggie Main Dishes. Stroganoff - Ska du laga en klassiker eller något nytt med en twist? Vi har alla recept du behöver! Tortellini är en sorts pasta med olika typer av fyllning, som svamp, ost eller parmesan- eller ricottaost.

So that is going to wrap it up with this special food stroganoff tortellini recipe. Thanks so much for reading. I am confident you can make this at home. There's gonna be interesting food at home recipes coming up. Don't forget to save this page in your browser, and share it to your loved ones, friends and colleague. Thank you for reading. Go on get cooking!

Easiest Way to Make Quick Veggies Wellington

Easiest Way to Make Quick Veggies Wellington

Veggies Wellington.

Veggies Wellington

Hey everyone, I hope you're having an amazing day today. Today, I will show you a way to prepare a distinctive dish, veggies wellington. One of my favorites. For mine, I will make it a little bit tasty. This will be really delicious.

Veggies Wellington is one of the most favored of recent trending foods on earth. It is simple, it's fast, it tastes delicious. It's enjoyed by millions every day. They're fine and they look fantastic. Veggies Wellington is something which I've loved my entire life.

To begin with this recipe, we must first prepare a few components. You can have veggies wellington using 17 ingredients and 5 steps. Here is how you can achieve that.

The ingredients needed to make Veggies Wellington:

  1. {Make ready of spinach (chop and clean).
  2. {Prepare of margarine.
  3. {Make ready of chopped shallot.
  4. {Prepare of coconut cream.
  5. {Make ready of assorted mushroom.
  6. {Take of margarine.
  7. {Make ready of sliced leek.
  8. {Take of beetroot (canned).
  9. {Get of chopped shallot.
  10. {Get of garlic.
  11. {Take of smoked paprika.
  12. {Make ready of rosemary.
  13. {Make ready of thyme.
  14. {Prepare of puff pastry (thaw 30 second).
  15. {Take of red wine.
  16. {Prepare of vegetable stock.
  17. {Make ready of corn starch slurry.

Steps to make Veggies Wellington:

  1. Sweat chopped shallot with margarine, add spinach, coconut cream, salt and pepper to taste, cook until tender and creamy.
  2. Sautee leek with oil, add mushroom, margarine, salt and pepper. set aside and blitz to fine texture.
  3. Sautee garlic mince and shallot with little oil, add drained beetroot, rosemary, smoked paprika, thyme and salt to taste. set aside then blitz it for fine texture.
  4. Preheat oven to 210 celcius. Thawed puff pastry, smear creamy spinach, then blitzed mushroom and beetroot in the middle, enclose to fold the pastry then trim the both side. Bake for 30 mins.
  5. For the red wine jus, i heat up some vegetable stock and pour red wine, then reduce, finish it with corn starch slurry..

So that's going to wrap it up for this exceptional food veggies wellington recipe. Thank you very much for reading. I'm sure you will make this at home. There is gonna be interesting food in home recipes coming up. Remember to save this page on your browser, and share it to your loved ones, friends and colleague. Thank you for reading. Go on get cooking!

Simple Way to Prepare Perfect My Lemon Garlic Buttered Chicken with
Spinach & Peas 😉

Simple Way to Prepare Perfect My Lemon Garlic Buttered Chicken with Spinach & Peas 😉

My Lemon Garlic Buttered Chicken with Spinach & Peas 😉.

My Lemon Garlic Buttered Chicken with Spinach & Peas 😉

Hey everyone, I hope you are having an amazing day today. Today, we're going to prepare a special dish, my lemon garlic buttered chicken with spinach & peas 😉. One of my favorites. This time, I will make it a little bit unique. This will be really delicious.

My Lemon Garlic Buttered Chicken with Spinach & Peas 😉 is one of the most favored of current trending meals in the world. It's simple, it is quick, it tastes delicious. It is appreciated by millions daily. They're fine and they look wonderful. My Lemon Garlic Buttered Chicken with Spinach & Peas 😉 is something which I have loved my entire life.

To begin with this recipe, we must first prepare a few components. You can have my lemon garlic buttered chicken with spinach & peas 😉 using 14 ingredients and 6 steps. Here is how you can achieve it.

The ingredients needed to make My Lemon Garlic Buttered Chicken with Spinach & Peas 😉:

  1. {Take 2 of chicken Breasts.
  2. {Prepare 3 tbls of Butter.
  3. {Prepare 2 tbls of fresh parsley chopoed.
  4. {Make ready 3 Cloves of Garlic crushed (i used smoked garlic).
  5. {Take 1/2 tsp of Paprika.
  6. {Get 1 tsp of onion powder.
  7. {Take 1/4 tsp of Chilli dried flakes crushed.
  8. {Make ready 1/2 tsp of cracked black peppercorns.
  9. {Prepare 1 pinch of salt.
  10. {Prepare 1 tbls of sriacha sauce.
  11. {Take 1/2 cup of chicken stock.
  12. {Take 3 handfuls of Spinach.
  13. {Get 1 cup of sweet peas(petit poìs).
  14. {Make ready 2 tbls of Lemon juice.

Steps to make My Lemon Garlic Buttered Chicken with Spinach & Peas 😉:

  1. Ingredients.
  2. In a small bowl add the salt pepper chilli flakes onion powder and Paprika mix up and add to the chicken all over..
  3. Melt 2 of the 3 tbls butter in a deep frying pan. Then add the chicken cook for 5 minutes turning over turn low if it gets to hot. Then take the chicken out and set aside.
  4. Add the other tbks butter to the same pan add the Garlic and chopped parsley stir for 1 minute then add the chicken stock and Sriracha sauce next add the Spinach..
  5. Stir the spinach until it settles down then add a squeese of Lemon 2 tbls..
  6. Add the chicken back to the pan then add the sweet peas simmer for 5 minutes then serve with some slices of Lemon to Garnish..

So that's going to wrap it up with this exceptional food my lemon garlic buttered chicken with spinach & peas 😉 recipe. Thank you very much for reading. I am sure you can make this at home. There is gonna be more interesting food at home recipes coming up. Don't forget to save this page on your browser, and share it to your loved ones, colleague and friends. Thanks again for reading. Go on get cooking!

Easiest Way to Prepare Quick Filipino Adobo Chicken

Easiest Way to Prepare Quick Filipino Adobo Chicken

Filipino Adobo Chicken.

Filipino Adobo Chicken

Hey everyone, I hope you're having an incredible day today. Today, I will show you a way to prepare a special dish, filipino adobo chicken. It is one of my favorites. This time, I am going to make it a little bit tasty. This is gonna smell and look delicious.

Filipino Adobo Chicken is one of the most well liked of recent trending foods on earth. It's simple, it is quick, it tastes yummy. It is appreciated by millions every day. They are fine and they look fantastic. Filipino Adobo Chicken is something that I have loved my entire life.

To begin with this recipe, we have to prepare a few ingredients. You can have filipino adobo chicken using 18 ingredients and 13 steps. Here is how you cook it.

The ingredients needed to make Filipino Adobo Chicken:

  1. {Prepare of mixed chicken thighs and legs.
  2. {Take of onion, sliced.
  3. {Take of canola oil.
  4. {Take of whole black peppercorns, smashed.
  5. {Take of powdered ginger.
  6. {Get of red pepper flakes.
  7. {Prepare of bay leaves.
  8. {Make ready of garlic, minced.
  9. {Make ready of xiaoxing rice wine.
  10. {Get of fish sauce.
  11. {Take of soy sauce.
  12. {Make ready of rice vinegar.
  13. {Prepare of chicken stock.
  14. {Get of unflavored gelatin.
  15. {Prepare of medium potatoes, chunked.
  16. {Make ready of carrot, diced.
  17. {Get of spring onions, sliced.
  18. {Prepare of sesame seeds.

Instructions to make Filipino Adobo Chicken:

  1. Prep your ingredients. Combine the soy, vinegar, and stock. If you have time marinate the chicken in this mixture for 2-3 hours before, but reserve the marinade when cooking the chicken..
  2. Dry the surface of your chicken with paper towels. This helps with browning later..
  3. Heat the oil in a Dutch oven over medium high heat. Add the chicken in 2 batches, skin side down..
  4. Sear until the chicken skin releases. ~10 min..
  5. Remove the first batch of chicken and set aside. Add the second batch and sear..
  6. Remove the second batch of chicken and deglaze the pan by adding the onions, xiaoxing, and fish sauce and scraping the pans bottom to get the fond up..
  7. Add the black pepper, ginger, red pepper, garlic and bay. Cook for 30 seconds..
  8. Add the soy, vinegar, stock solutions. If you marinated the chicken, add this reserved marinade..
  9. When the mixture come to a simmer add the chicken back to the pot.
  10. Add the potatoes and carrots on top and nestle into the liquid..
  11. Bring the pot to a simmer and then simmer covered on low for 40 minutes to cook the chicken and vegetables..
  12. Remove the cover and reduce the sauce for 10 minutes..
  13. Plate some jasmine rice and garnish with sesame and sliced green onion.

So that's going to wrap this up for this exceptional food filipino adobo chicken recipe. Thank you very much for reading. I am sure that you can make this at home. There is gonna be interesting food at home recipes coming up. Don't forget to save this page on your browser, and share it to your family, colleague and friends. Thanks again for reading. Go on get cooking!

Recipe of Ultimate Matcha Overnight Rolled Oats

Recipe of Ultimate Matcha Overnight Rolled Oats

Matcha Overnight Rolled Oats.

Matcha Overnight Rolled Oats

Hey everyone, it's me again, Dan, welcome to our recipe page. Today, we're going to prepare a special dish, matcha overnight rolled oats. It is one of my favorites food recipes. This time, I'm gonna make it a bit unique. This will be really delicious.

Matcha Overnight Rolled Oats is one of the most favored of current trending meals on earth. It's appreciated by millions daily. It's simple, it is quick, it tastes delicious. Matcha Overnight Rolled Oats is something which I've loved my entire life. They're nice and they look fantastic.

To get started with this particular recipe, we have to prepare a few components. You can cook matcha overnight rolled oats using 8 ingredients and 1 steps. Here is how you can achieve it.

The ingredients needed to make Matcha Overnight Rolled Oats:

  1. {Make ready 40 g of rolled oats.
  2. {Take 100 g of unsweetened coconut milk.
  3. {Get 50 g of probiotic greek yoghurt.
  4. {Take 10 g of chia seeds.
  5. {Make ready 30 g of powdered golden monkfruit.
  6. {Get 1 tsp of matcha powder (good quality).
  7. {Prepare 1/4 tsp of vanilla extract.
  8. {Prepare Pinch of salt.

Instructions to make Matcha Overnight Rolled Oats:

  1. Mix all in jar. Keep overnight.

So that is going to wrap it up for this special food matcha overnight rolled oats recipe. Thanks so much for your time. I'm confident you will make this at home. There's gonna be more interesting food in home recipes coming up. Remember to save this page in your browser, and share it to your loved ones, colleague and friends. Thank you for reading. Go on get cooking!

Recipe of Quick BEFF Biriyani

Recipe of Quick BEFF Biriyani

BEFF Biriyani. Amazing Beef Biryani recipe just in time for the perfect occasion. Now impress the guests with your cooking skills. #HappyCookingToYou. Beef Biryani Recipe - How to make Degi Beef Biryani by Chef Asifa.

BEFF Biriyani This delicious beef biryani is great for freezing - just be sure to allow everything to cool first. Beef Biryani is super easy to make and while it may seem many steps are involved, I can guarantee you that they're all totally worth it. Martha's version of this classic dish layers succulent beef short ribs with caramelized onions and colorful spiced basmati rice -- it's fit for any celebratory meal.

Hey everyone, it's Louise, welcome to our recipe site. Today, we're going to prepare a special dish, beff biriyani. It is one of my favorites food recipes. For mine, I will make it a little bit unique. This is gonna smell and look delicious.

Amazing Beef Biryani recipe just in time for the perfect occasion. Now impress the guests with your cooking skills. #HappyCookingToYou. Beef Biryani Recipe - How to make Degi Beef Biryani by Chef Asifa.

BEFF Biriyani is one of the most popular of current trending foods in the world. It's simple, it is quick, it tastes yummy. It is appreciated by millions every day. BEFF Biriyani is something which I have loved my whole life. They're nice and they look fantastic.

To begin with this particular recipe, we must first prepare a few components. You can have beff biriyani using 20 ingredients and 13 steps. Here is how you can achieve it.

The ingredients needed to make BEFF Biriyani:

  1. {Take 500 gm of meat.
  2. {Get of Boild rice.
  3. {Get 2 of big tomatos.
  4. {Take Handful of cashew nut.
  5. {Get As needed of Colour food.
  6. {Prepare 1/2-1 cup of yogurt.
  7. {Take 2 of onion.
  8. {Prepare 2 cloves of garlic.
  9. {Get 1 of green bell pepper.
  10. {Make ready As needed of ginger or ginger paste.
  11. {Get 1/2 of Ts kashmiri chili powder.
  12. {Get 1 stick of cinnamon.
  13. {Prepare 2 of bay leaves.
  14. {Prepare 4 of cardamom.
  15. {Get Pinch of Mix masala.
  16. {Take 1/2 of turmeric.
  17. {Get Pinch of crashed Black pepper.
  18. {Make ready Pinch of Dried coriander.
  19. {Make ready Pinch of dried cumin.
  20. {Make ready 1 of Maggie or stock cube.

Biryani (/bɜːrˈjɑːni/) is a mixed rice dish originating among the Muslims of the Indian subcontinent. It is made with Indian spices, rice, and meat (chicken, beef, goat, lamb, prawn, or fish), and sometimes. Heat oil in a pan, add whole spices and let it cook unless it makes a noise. Spread a layer of biryani meat gravy (korma), spread a layer of rice and then pour yellow coloring.

Steps to make BEFF Biriyani:

  1. Wash meat with once with water..
  2. Add the yogurt with all spice marinate it for one night or few hours before cooking as needed..
  3. Add oil to the pan fry onion and garlic..
  4. Take half of onion keep for later..
  5. Add meat to onion turn to both side then add green bell pepper..
  6. Add two tomatoes and Maggie..
  7. Add Some water until oil spreated from sauce and meat cooked..
  8. Add part of ready boild rice down on the in the dish..
  9. Then the meat with sauce, green bell pepper and tomato..
  10. Add the other half of rice on the top of meat..
  11. Add one food colour or two as you like..
  12. Put in the top onion and cashew nut..
  13. Serve it with yogurt salads if you like..

Serve hot, topped with beef masala/gravy and garnished with more fried onions, chopped coriander W/Salaam, actually biryani is W/Salaam, actually biryani is not ALWAYS layered. An easy Beef Biryani Recipe that is bursting with deep, rich Middle-Eastern flavours, this is the perfect dish to share with your family. This beef biryani is absolutely amazing: easy for sure, but not as. Biryani is a popular recipe made on Ramadan. Biryani is a Pakistani-Indian dish it's layered of rice with spicy and delicious beef, caramelized onions, and colorful spiced basmati rice it's fit for.

So that's going to wrap this up with this special food beff biriyani recipe. Thanks so much for reading. I am sure that you can make this at home. There's gonna be interesting food at home recipes coming up. Don't forget to save this page in your browser, and share it to your loved ones, friends and colleague. Thanks again for reading. Go on get cooking!

Recipe of Award-winning Rosemary Braised Red Cabbage

Recipe of Award-winning Rosemary Braised Red Cabbage

Rosemary Braised Red Cabbage.

Rosemary Braised Red Cabbage

Hey everyone, it's Louise, welcome to my recipe site. Today, I'm gonna show you how to prepare a special dish, rosemary braised red cabbage. It is one of my favorites. For mine, I will make it a little bit tasty. This will be really delicious.

Rosemary Braised Red Cabbage is one of the most well liked of recent trending foods on earth. It is easy, it's quick, it tastes delicious. It's appreciated by millions daily. Rosemary Braised Red Cabbage is something which I have loved my entire life. They are fine and they look wonderful.

To get started with this particular recipe, we have to prepare a few components. You can cook rosemary braised red cabbage using 10 ingredients and 3 steps. Here is how you cook it.

The ingredients needed to make Rosemary Braised Red Cabbage:

  1. {Prepare of red cabbage.
  2. {Make ready of olive oil.
  3. {Get of Knob of butter.
  4. {Prepare of red onion, sliced.
  5. {Get of red wine vinegar.
  6. {Make ready of soft dark brown sugar.
  7. {Get of red chilli, finely chopped.
  8. {Make ready of rosemary sprigs.
  9. {Prepare of Granny Smith apple, cored & roughly chopped.
  10. {Prepare of water.

Steps to make Rosemary Braised Red Cabbage:

  1. Halve the cabbage, remove the tough stem and thinly slice. Place in a large pan with all the other ingredients apart from the sausages, then mix in 150ml water and some salt and pepper..
  2. Bring to a simmer, then reduce the heat, cover with a well-fitting lid and gently cook for 1½ hrs, stirring frequently. If too dry, you can add a little more water..
  3. Remove the lid and cook for a further 10 mins. Serve alongside some steaks and baked potatoes..

So that's going to wrap this up for this special food rosemary braised red cabbage recipe. Thank you very much for reading. I'm sure you will make this at home. There is gonna be interesting food at home recipes coming up. Don't forget to save this page on your browser, and share it to your family, friends and colleague. Thank you for reading. Go on get cooking!

How to Make Ultimate Treat day Smoothie with Nutella

How to Make Ultimate Treat day Smoothie with Nutella

Treat day Smoothie with Nutella.

Treat day Smoothie with Nutella

Hello everybody, it's John, welcome to our recipe page. Today, I'm gonna show you how to make a distinctive dish, treat day smoothie with nutella. One of my favorites. This time, I'm gonna make it a little bit unique. This will be really delicious.

Treat day Smoothie with Nutella is one of the most popular of current trending meals on earth. It's easy, it's fast, it tastes delicious. It's enjoyed by millions every day. Treat day Smoothie with Nutella is something that I've loved my whole life. They are fine and they look wonderful.

To begin with this recipe, we have to first prepare a few components. You can have treat day smoothie with nutella using 11 ingredients and 6 steps. Here is how you cook it.

The ingredients needed to make Treat day Smoothie with Nutella:

  1. {Prepare 1/2 cup of Skimmed Milk.
  2. {Make ready 1 of Apple.
  3. {Make ready 5 of Strawberries.
  4. {Prepare 1 of Banana.
  5. {Make ready 3 tbsp of Greek Yoghurt.
  6. {Get 1 tsp of Syrup or Honey.
  7. {Make ready 2 tsp of Peanut Butter.
  8. {Make ready 2 tsp of Nutella.
  9. {Take 1 of Orange Juice.
  10. {Prepare 4 of Ice cubes.
  11. {Get 3 tbsp of Porridge Oats.

Instructions to make Treat day Smoothie with Nutella:

  1. Pour the milk into the blender..
  2. Peel and chop the Apple and banana . Chop the strawberries and add all fruit to the blender..
  3. Blend the fruit and milk with 4 ice cubes..
  4. Open blender and add in the Greek yoghurt, nutella, honey and peanut butter..
  5. Sprinkle in the porridge oats and blend..
  6. Serve immediately and enjoy!.

So that is going to wrap this up with this exceptional food treat day smoothie with nutella recipe. Thanks so much for your time. I'm sure you will make this at home. There is gonna be more interesting food at home recipes coming up. Remember to bookmark this page in your browser, and share it to your family, colleague and friends. Thank you for reading. Go on get cooking!

Easiest Way to Prepare Perfect Chinese-style shrimp balls with shrimp
sauce

Easiest Way to Prepare Perfect Chinese-style shrimp balls with shrimp sauce

Chinese-style shrimp balls with shrimp sauce.

Chinese-style shrimp balls with shrimp sauce

Hey everyone, it is me again, Dan, welcome to our recipe page. Today, we're going to prepare a distinctive dish, chinese-style shrimp balls with shrimp sauce. One of my favorites. This time, I'm gonna make it a little bit unique. This is gonna smell and look delicious.

Chinese-style shrimp balls with shrimp sauce is one of the most favored of current trending foods on earth. It's simple, it is fast, it tastes yummy. It's enjoyed by millions daily. They are nice and they look fantastic. Chinese-style shrimp balls with shrimp sauce is something that I have loved my whole life.

To get started with this particular recipe, we must first prepare a few ingredients. You can have chinese-style shrimp balls with shrimp sauce using 16 ingredients and 13 steps. Here is how you cook it.

The ingredients needed to make Chinese-style shrimp balls with shrimp sauce:

  1. {Get of Shrimp balls.
  2. {Prepare of shrimp.
  3. {Get of potato starch or corn starch.
  4. {Take of salt.
  5. {Get of egg white.
  6. {Prepare of sesame oil.
  7. {Prepare of white pepper (original recipe says 1/8).
  8. {Take of Shrimp sauce.
  9. {Prepare of Shells, tails, and heads from the shrimp.
  10. {Take of minced garlic.
  11. {Get of minced ginger.
  12. {Prepare of chopped green onions.
  13. {Get of small pinch chili flakes (optional).
  14. {Get of chicken broth.
  15. {Prepare of oil.
  16. {Take of Corn starch slurry.

Steps to make Chinese-style shrimp balls with shrimp sauce:

  1. Peel and devein shrimp. Reserve shells, tails, and heads for the sauce..
  2. Mix the shrimp, salt, and 1 tsp of the starch in a bowl. Let sit for seven minutes..
  3. After seven minutes, thoroughly rinse off the shrimp, then pat dry with paper towels. Once the shrimp are dry, chop them up roughly, put them in a bowl, and mash them into a paste..
  4. Add in the remaining 1 tsp of starch, egg white, sesame oil, and pepper. Stir until thoroughly combined. IMPORTANT: stir in ONE DIRECTION only. This is key for the consistency of the paste..
  5. Once combined, gather up the paste in one hand and throw it hard back into the bowl (not baseball pitcher hard but with some real force). THIS STEP IS IMPORTANT. I believe this is to help break down the proteins and give the balls that firm consistency. Do this at least six times and until paste is sticky (I did it more like ten or twelve)..
  6. Cover shrimp mixture and let chill in the fridge for 30 minutes..
  7. While the shrimp mixture chills, make the sauce..
  8. Over medium heat, cook the garlic, ginger, and green onions in the oil until fragrant (about 30 secs to one minute). Add in the reserved shells, tails, and heads, and cook until they turn color. As they cook, press down on them to extract max flavor..
  9. Add in chicken stock (and chili flakes, if you like spicy), turn up the heat to a near boil, then reduce the heat and let simmer until sauce reduces, around 20 minutes. Continue to press on the shells, etc. and add more stock if reducing too quickly..
  10. When reduced by half or more, strain the sauce and reserve the liquid..
  11. Take the shrimp paste out of the fridge, form it into balls, and then steam them over high heat for five minutes. You should get about twelve balls in total if you make a full batch..
  12. While the balls cook, put the sauce in a pan, gently simmer, and add a little slurry to thicken it up a bit (easy to overdo this)..
  13. Remove balls from steamer, pour sauce over them, garnish as you like (I used ginger and cilantro), and serve..

So that's going to wrap it up for this special food chinese-style shrimp balls with shrimp sauce recipe. Thank you very much for reading. I'm sure you will make this at home. There's gonna be more interesting food in home recipes coming up. Don't forget to save this page on your browser, and share it to your loved ones, friends and colleague. Thank you for reading. Go on get cooking!

Steps to Make Perfect Fettuccine chicken Alfredo

Steps to Make Perfect Fettuccine chicken Alfredo

Fettuccine chicken Alfredo.

Fettuccine chicken Alfredo

Hey everyone, it's me, Dave, welcome to my recipe site. Today, I'm gonna show you how to make a distinctive dish, fettuccine chicken alfredo. It is one of my favorites. For mine, I will make it a bit tasty. This is gonna smell and look delicious.

Fettuccine chicken Alfredo is one of the most popular of current trending foods on earth. It's enjoyed by millions every day. It's simple, it is fast, it tastes yummy. They're nice and they look fantastic. Fettuccine chicken Alfredo is something that I have loved my whole life.

To get started with this recipe, we have to first prepare a few ingredients. You can cook fettuccine chicken alfredo using 7 ingredients and 7 steps. Here is how you cook that.

The ingredients needed to make Fettuccine chicken Alfredo:

  1. {Get of fettuccine pasta.
  2. {Get of Salt and pepper.
  3. {Take of cut up chicken thigh.
  4. {Take of butter.
  5. {Prepare of heavy cream.
  6. {Prepare of nutmeg ground.
  7. {Prepare of grated Parmesan cheese (Can be from store).

Steps to make Fettuccine chicken Alfredo:

  1. Cook pasta according to instructions add salt and pepper to taste and add a dash of oil. Drain.
  2. A large skillet, add 2 tablespoons of butter (from the stick) put chicken thighs in and season with salt, pepper, and chicken seasoning..
  3. Cook through 2 to 3 minutes on each side..
  4. In a pot put the heavy cream, butter, and nutmeg and whisk in together until sizzling..
  5. Then add and cheese in the heavy cream mixture and mix with a whisk..
  6. Add the sauce to the pasta and heat up for three minutes..
  7. That’s it enjoy!! 🤩.

So that is going to wrap this up for this exceptional food fettuccine chicken alfredo recipe. Thanks so much for your time. I'm sure that you can make this at home. There is gonna be interesting food in home recipes coming up. Don't forget to bookmark this page in your browser, and share it to your loved ones, colleague and friends. Thanks again for reading. Go on get cooking!

Recipe of Super Quick Homemade Smoked Salmon and shrimp cream cheese
Sushi

Recipe of Super Quick Homemade Smoked Salmon and shrimp cream cheese Sushi

Smoked Salmon and shrimp cream cheese Sushi.

Smoked Salmon and shrimp cream cheese Sushi

Hey everyone, hope you are having an incredible day today. Today, we're going to prepare a distinctive dish, smoked salmon and shrimp cream cheese sushi. One of my favorites. For mine, I am going to make it a bit unique. This is gonna smell and look delicious.

Smoked Salmon and shrimp cream cheese Sushi is one of the most favored of current trending meals on earth. It is easy, it is fast, it tastes delicious. It is appreciated by millions daily. They're fine and they look wonderful. Smoked Salmon and shrimp cream cheese Sushi is something that I have loved my entire life.

To get started with this recipe, we must prepare a few components. You can cook smoked salmon and shrimp cream cheese sushi using 12 ingredients and 12 steps. Here is how you can achieve that.

The ingredients needed to make Smoked Salmon and shrimp cream cheese Sushi:

  1. {Get 1 Package of Seaweed Wrap.
  2. {Take 2 Cups of Rice.
  3. {Prepare 2 of Avocados.
  4. {Get 1 Package of Salmon Smoked.
  5. {Take 1 Package of Enoki Mushrooms (Optional).
  6. {Take 1 Jar of Tobiko/Masago (Fish Eggs).
  7. {Make ready 1 Package of Cream Cheese.
  8. {Prepare 1 of Small Canned Shrimp.
  9. {Prepare of Seasme Seeds.
  10. {Take of Sushi Mat (Or something flexible).
  11. {Get of Wasabi & Ginger (Optional).
  12. {Prepare of Sushi vinegar.

Instructions to make Smoked Salmon and shrimp cream cheese Sushi:

  1. Cook rice in rice cooker or on the stove add a small amount of olive oil to the water. When done cooking add sushi vinegar and let cool..
  2. Mix together 1/2 cup cream cheese with one 1 can of shrimp. (You can use the rest of the cream cheese as normal.).
  3. Slice the Avocados, Mushrooms, and smoked salmon into THIN strips about half the size of your pinky..
  4. Grab a small bowl of cold water..
  5. Place down your sushi mat at a table in front of you have all the cut ingredients to the side of you. Place down a sheet of seaweed..
  6. Get your hands wet with the cold water and pick up a small fist full of rice stick the rice in the middle of the seaweed and slowly pull the rice into all four corners DO NOT SMASH THE RICE DOWN..
  7. When rice is evenly distributed sprinkle sesame seeds and tobiko to the surface..
  8. CAREFUL grab edges of seaweed and flip over onto the other side. repeat steps 6 and 7..
  9. In the middle of the sushi add all of your ingredients (Salmon, Cream Cheese/ Shrimp mixture, Mushrooms, Avocados, ETC.).
  10. When ready take the mat and fold the seaweed just over the middle of the ingredients. Add pressure with your four fingers and squeeze pull back mat and make adjustments as needed. Roll the rest normally, push in sides if needed..
  11. Now time to cut! Try not to push so hard with the knife use a very gentle sawing motion serrated knifes work best for this. To cut into perfect pieces cut exactly in half and cut those halves in half..
  12. Your done! Server with a side of ginger or wasabi and make your own variations! If you used this recipe please give me some feedback! Pictures are great as well..

So that is going to wrap this up with this special food smoked salmon and shrimp cream cheese sushi recipe. Thanks so much for your time. I am sure that you can make this at home. There is gonna be interesting food at home recipes coming up. Don't forget to save this page on your browser, and share it to your loved ones, colleague and friends. Thanks again for reading. Go on get cooking!

Easiest Way to Prepare Favorite green sauce

Easiest Way to Prepare Favorite green sauce

green sauce. Green sauce or greensauce is a family of cold, uncooked sauces based on chopped herbs, including the Spanish and Italian salsa verde, the French sauce verte. Made with easy ingredients like avocado, olive oil, cilantro, lime, garlic, and parsley! This green sauce is such a natural part of my life that I never previously thought to share the recipe.

green sauce Green Chilli Sauce - easy way to make green Chilli Sauce. Peruvian green sauce also known as Aji Verde is a spicy bright green condiment typically found in any Peruvian restaurant. This Green Enchilada Sauce recipe is quick and easy to make, naturally gluten-free, and full of the best savory green chile flavor.

Hello everybody, hope you're having an amazing day today. Today, I will show you a way to make a special dish, green sauce. One of my favorites food recipes. This time, I am going to make it a bit tasty. This is gonna smell and look delicious.

Green sauce or greensauce is a family of cold, uncooked sauces based on chopped herbs, including the Spanish and Italian salsa verde, the French sauce verte. Made with easy ingredients like avocado, olive oil, cilantro, lime, garlic, and parsley! This green sauce is such a natural part of my life that I never previously thought to share the recipe.

green sauce is one of the most well liked of recent trending meals in the world. It's simple, it is fast, it tastes yummy. It's enjoyed by millions daily. They're fine and they look fantastic. green sauce is something that I've loved my entire life.

To get started with this recipe, we have to prepare a few ingredients. You can cook green sauce using 7 ingredients and 1 steps. Here is how you can achieve it.

The ingredients needed to make green sauce:

  1. {Get of I love green sauce with Biryani.
  2. {Prepare 1 bunch of fresh green coriander.
  3. {Make ready 4 piece of of garlic.
  4. {Prepare 3 of green chili.
  5. {Take 1 tsp of salt.
  6. {Get 1/2 tsp of cumin powder.
  7. {Prepare 2 cup of plain yogurt.

Perfect for making enchiladas verdes. "Green-sauce is made thus; Take some green corn [i.e wheat], burn a tost of bread, with vinegar, a little peper and salt, and stamp it all together in a mortar, and strain it through a linen cloath. You just need to adjust the amount of blending and the amount of water to get the texture that is right for you, or just use exactly the quantities given in the recipe and it. Peruvian Green Sauce - a fresh, vibrant sauce that's fabulous drizzled on anything from the grill. t's also great with potatoes, rice, drizzled on black beans as a dipping sauce for shrimp. In fact, "green sauce" is even less specific than "the Village": There are only three possible Villages, but there are about a thousand different green sauces.

Steps to make green sauce:

  1. add fresh green coriander , green chili ,garlic, salt and Cumin powder and make a soft smoothie sauce . add yogurt and mix ..

And I am certain the same love of vagueness is. Find green sauce stock images in HD and millions of other royalty-free stock photos, illustrations and vectors in the Shutterstock collection. Thousands of new, high-quality pictures added every day. Homemade Green Enchilada Sauce is an easy, roasted tomatillo enchilada sauce recipe that's fresh, flavorful and comes together in minutes! I can't tell you how often I develop recipes and I don't have.

So that's going to wrap this up for this special food green sauce recipe. Thank you very much for reading. I am sure that you can make this at home. There is gonna be more interesting food at home recipes coming up. Don't forget to bookmark this page on your browser, and share it to your loved ones, friends and colleague. Thanks again for reading. Go on get cooking!

Step-by-Step Guide to Make Any-night-of-the-week Protein/ Vitamin C
Burst Salad

Step-by-Step Guide to Make Any-night-of-the-week Protein/ Vitamin C Burst Salad

Protein/ Vitamin C Burst Salad.

Protein/ Vitamin C Burst Salad

Hello everybody, it is Brad, welcome to my recipe page. Today, we're going to make a distinctive dish, protein/ vitamin c burst salad. It is one of my favorites food recipes. For mine, I'm gonna make it a little bit unique. This will be really delicious.

Protein/ Vitamin C Burst Salad is one of the most favored of current trending foods in the world. It's appreciated by millions every day. It is easy, it's quick, it tastes delicious. Protein/ Vitamin C Burst Salad is something which I have loved my whole life. They are fine and they look fantastic.

To begin with this particular recipe, we must first prepare a few ingredients. You can cook protein/ vitamin c burst salad using 8 ingredients and 2 steps. Here is how you can achieve it.

The ingredients needed to make Protein/ Vitamin C Burst Salad:

  1. {Make ready 1 head of Artisan Lettuce.
  2. {Make ready 1 of Red Pepper, cut in thick chunks.
  3. {Take 2 of Avocados, sliced.
  4. {Get 2 slices of Vegan Smoked Gouda, cut into squares.
  5. {Take 2 tablespoons of chia seeds.
  6. {Get 2 tablespoons of hemp seeds.
  7. {Prepare 2 tablespoons of flax seeds.
  8. {Take 1/4 cup of olive oil.

Instructions to make Protein/ Vitamin C Burst Salad:

  1. Simply combine all ingredients in a large bowl (preferably bamboo).
  2. Enjoy!.

So that is going to wrap this up for this exceptional food protein/ vitamin c burst salad recipe. Thanks so much for your time. I am sure that you will make this at home. There's gonna be interesting food at home recipes coming up. Don't forget to bookmark this page on your browser, and share it to your loved ones, colleague and friends. Thanks again for reading. Go on get cooking!

Step-by-Step Guide to Prepare Any-night-of-the-week Veg biryani

Step-by-Step Guide to Prepare Any-night-of-the-week Veg biryani

Veg biryani.

Veg biryani

Hello everybody, hope you're having an incredible day today. Today, I will show you a way to prepare a distinctive dish, veg biryani. One of my favorites. For mine, I will make it a little bit unique. This will be really delicious.

Veg biryani is one of the most favored of current trending foods on earth. It's easy, it's fast, it tastes yummy. It is enjoyed by millions every day. They are nice and they look fantastic. Veg biryani is something that I've loved my whole life.

To begin with this recipe, we must prepare a few components. You can have veg biryani using 14 ingredients and 3 steps. Here is how you can achieve it.

The ingredients needed to make Veg biryani:

  1. {Get 1 cup of basmati rice.
  2. {Prepare 3 tbsp of desi ghee.
  3. {Get 1 tbsp of -peanuts,cashews(it’s optional).
  4. {Make ready 1 cup of chopped veggies (peas,beans,carrots,capsicum,potato,cauliflower).
  5. {Get 2 tbsp of thick curd.
  6. {Make ready 1 tbsp of ginger garlic paste.
  7. {Prepare 1/2 cup of chopped onion.
  8. {Get 1 tbsp of shahi jeera.
  9. {Make ready 2 of Bay leaf.
  10. {Get 2 of black,green cardamom.
  11. {Prepare To taste of Salt and pepper,.
  12. {Make ready 1 of Green chilli.
  13. {Make ready 1 tbsp of biryani masala.
  14. {Take Handful of coriander,mint leaves.

Steps to make Veg biryani:

  1. Heat a deep pan put desi ghee add jeera,cardamom,tej patta and crackle it now add chopped onion, ginger garlic paste sauté it for a few minutes.
  2. Now add all chopped veggies,curd,mint, coriander leaves,put all spices and mix it together nicely.
  3. Now add soaked rice,water and cook for one whistle and after few minutes switch off the flame. Ur yummy delicious veg biryani ready to serve with curd, mint chutney.

So that is going to wrap this up with this exceptional food veg biryani recipe. Thanks so much for reading. I'm sure that you can make this at home. There's gonna be interesting food at home recipes coming up. Don't forget to bookmark this page in your browser, and share it to your family, friends and colleague. Thank you for reading. Go on get cooking!

Easiest Way to Make Quick Jalapeño egg roll poppers

Easiest Way to Make Quick Jalapeño egg roll poppers

Jalapeño egg roll poppers.

Jalapeño egg roll poppers

Hello everybody, I hope you are having an incredible day today. Today, we're going to make a special dish, jalapeño egg roll poppers. One of my favorites food recipes. For mine, I am going to make it a little bit unique. This will be really delicious.

Jalapeño egg roll poppers is one of the most well liked of recent trending foods on earth. It's easy, it's quick, it tastes yummy. It is appreciated by millions daily. Jalapeño egg roll poppers is something which I have loved my whole life. They are nice and they look wonderful.

To get started with this recipe, we have to first prepare a few ingredients. You can have jalapeño egg roll poppers using 4 ingredients and 6 steps. Here is how you cook it.

The ingredients needed to make Jalapeño egg roll poppers:

  1. {Get 2 of egg roll wrappers.
  2. {Get 8 teaspoons of cream cheese.
  3. {Get 8 teaspoons of diced jalapeño peppers.
  4. {Take as needed of oil to fry.

Steps to make Jalapeño egg roll poppers:

  1. Cut the wrappers into forths.
  2. Add 1 teaspoon cream cheese and jalapeño peppers to each forth.
  3. Heat oil. Fold and roll repeat till all 8 are ready.
  4. Fry in hot oil this will not take long. Turn often so not to burn..
  5. When done move to a paper towel to absorb excessive oil.
  6. Serve hope you enjoy!.

So that is going to wrap this up with this special food jalapeño egg roll poppers recipe. Thanks so much for reading. I'm confident you can make this at home. There is gonna be more interesting food in home recipes coming up. Remember to save this page in your browser, and share it to your family, friends and colleague. Thanks again for reading. Go on get cooking!

Simple Way to Prepare Homemade Toast & Scrambled eggs

Simple Way to Prepare Homemade Toast & Scrambled eggs

Toast & Scrambled eggs.

Toast & Scrambled eggs

Hey everyone, it is Drew, welcome to our recipe page. Today, we're going to prepare a special dish, toast & scrambled eggs. It is one of my favorites food recipes. For mine, I will make it a little bit tasty. This is gonna smell and look delicious.

Toast & Scrambled eggs is one of the most popular of current trending meals on earth. It is simple, it's quick, it tastes yummy. It's appreciated by millions daily. Toast & Scrambled eggs is something which I have loved my entire life. They're nice and they look fantastic.

To get started with this recipe, we must first prepare a few components. You can have toast & scrambled eggs using 10 ingredients and 6 steps. Here is how you cook that.

The ingredients needed to make Toast & Scrambled eggs:

  1. {Prepare of Toast.
  2. {Prepare 1 slice of of chia seed whole grain bread.
  3. {Get 4 of fresh strawberries.
  4. {Make ready 2 tbsp of of peanut butter.
  5. {Make ready 1 tbsp of of honey.
  6. {Make ready of Scrambled Eggs.
  7. {Make ready 2 of eggs.
  8. {Prepare 1 of salt & pepper.
  9. {Take 1 pinch of of paprika.
  10. {Make ready 1 of garlic clove, minced.

Steps to make Toast & Scrambled eggs:

  1. Preheat 2 of your frying pans in medium heat and add olive oil with minced garlic..
  2. In a small mixing bowl, mix peanut butter and honey together until they are blended evenly..
  3. Place your toast on the heated frying pan. Cook 1-2 mins both sides..
  4. Utilizing the other heated frying pan, cook the eggs and sason it with salt, pepper and paprika to your taste..
  5. Add sliced strawberries on top of the peanut butter and honey toast; serve with seasoned eggs..
  6. Enjoy!!.

So that's going to wrap this up for this exceptional food toast & scrambled eggs recipe. Thank you very much for reading. I am confident that you can make this at home. There's gonna be interesting food at home recipes coming up. Don't forget to bookmark this page on your browser, and share it to your family, colleague and friends. Thank you for reading. Go on get cooking!

Steps to Prepare Favorite Creamy sponge cake

Steps to Prepare Favorite Creamy sponge cake

Creamy sponge cake.

Creamy sponge cake

Hello everybody, I hope you're having an incredible day today. Today, I'm gonna show you how to prepare a special dish, creamy sponge cake. One of my favorites. For mine, I will make it a little bit tasty. This is gonna smell and look delicious.

Creamy sponge cake is one of the most well liked of current trending meals on earth. It is simple, it's quick, it tastes yummy. It is appreciated by millions every day. They're fine and they look fantastic. Creamy sponge cake is something which I have loved my whole life.

To begin with this recipe, we have to first prepare a few ingredients. You can cook creamy sponge cake using 8 ingredients and 11 steps. Here is how you cook it.

The ingredients needed to make Creamy sponge cake:

  1. {Make ready of small bowl flour (bowl pic in method).
  2. {Take of sugar.
  3. {Take of eggs.
  4. {Make ready of Vanilla essence.
  5. {Get of For frosting.
  6. {Get of Whipped cream.
  7. {Prepare of Cocoa powder as required.
  8. {Get of Choco chips as required.

Steps to make Creamy sponge cake:

  1. 1 bowl mein eggs dal dein then achy se beat krna start karein beat karty karty sath mein sugar add karty jain (1 sath nahi dalni thori thori karky dalni hai).
  2. Jab bohat achy se thick hojaye to usme essence dalen.. and then hath se mix karein... spatula se nahi krna hai..ab maida thora thora add karein and mix karty jain ( aik saath sara nahi dalna... jab thick hojaye to side krden.
  3. Ab 1 cake pan lein butter papr laga kar butter lagaden paper par bhi or sides mein bhi :) or batter dal dein (note : cake ka batter add krny ke baad tap tap nahi krna pan.. bus daal ke rkhden..).
  4. Ab aik pateli mein pani garam krny rakhen or stand rkhden jab pani boil hoajye to cake rakhden or dhak dein.. kamaskam 30 mins baad kholen or check karein toothpick ya knife jo bhi ho...
  5. Sponge cake check kiya hai ready hogaya 😍😋.
  6. Ab cake ko thanda karein... cake bilkul thanda hojaye dehan rahe zara sa bhi garam na ho warna cream melt hony lagygi....
  7. Ab whippy whip cream ko beat karein or fluffy hony tak beat karein....
  8. Cream fluffy hogayi ab frosting start karein... cake ko beech mein se 2 parts mein cut krlen cream laaga dein ab uspe 2nd part rakh dein then upar se bhi poora cover karein cream se 😍 and center mein choco chips add karein.
  9. Achy se scissor se level karein cream ko. mery pass nozzle nahi thy mene khud plastic nozzle banaye and pipping bag bhi butter paper se...
  10. Piping bag mein nozzle lagain or batter cream ka fill karein and is tarhan se topping start karein cake ki...
  11. Cake ready.

So that's going to wrap it up for this exceptional food creamy sponge cake recipe. Thanks so much for reading. I am confident you will make this at home. There is gonna be more interesting food in home recipes coming up. Don't forget to save this page in your browser, and share it to your loved ones, colleague and friends. Thank you for reading. Go on get cooking!

How to Make Super Quick Homemade Cajun Shrimp Alfredo

How to Make Super Quick Homemade Cajun Shrimp Alfredo

Cajun Shrimp Alfredo.

Cajun Shrimp Alfredo

Hey everyone, it's Drew, welcome to our recipe page. Today, we're going to prepare a distinctive dish, cajun shrimp alfredo. One of my favorites. For mine, I will make it a bit tasty. This will be really delicious.

Cajun Shrimp Alfredo is one of the most popular of recent trending meals in the world. It's enjoyed by millions every day. It is simple, it's fast, it tastes delicious. They're fine and they look fantastic. Cajun Shrimp Alfredo is something which I've loved my whole life.

To get started with this particular recipe, we must first prepare a few components. You can cook cajun shrimp alfredo using 13 ingredients and 5 steps. Here is how you cook it.

The ingredients needed to make Cajun Shrimp Alfredo:

  1. {Get of Raw, Peeled & Deveined Tail Off Shrimp.
  2. {Prepare of Pasta of Choice.
  3. {Take of cans of Diced Tomatoes, Drained.
  4. {Prepare of Alfredo Sauce of Choice.
  5. {Take of Shredded Parmesan Cheese.
  6. {Prepare of Heavy Whipping Cream.
  7. {Take of Salted Butter.
  8. {Take of Olive Oil.
  9. {Take of Garlic Powder.
  10. {Prepare of Onion Powder.
  11. {Make ready of Smoked Paprika.
  12. {Take of Dried Parsley.
  13. {Prepare of Cajun Seasoning.

Steps to make Cajun Shrimp Alfredo:

  1. Place shrimp in a large bowl with 2 Tbs of olive oil, 2 Tbs of Cajun seasoning, 1/2 tsp garlic powder, 1/2 tsp onion powder & 1/2 tsp smoked paprika. Stir until well coated. Set aside..
  2. Cook Pasta According to Directions. Optional: Add Salt, Pepper, Cajun Seasoning & Olive Oil to water if desired. Set Aside..
  3. Heat 2 Tbs of butter with 1 tsp of olive oil in a pan over medium-high heat. Stir in 1 Tbs of Cajun Seasoning. Sauté 2 cans of Drained, diced tomatoes until heated throughout. Set Aside..
  4. Heat 3 Tbs of Butter and 1 tsp of Olive Oil in a pan over medium-high heat. Cook shrimp until pink and cooked throughout. Set Aside..
  5. Pour Alfredo Sauce into a large pan. Add 1 cup of heavy whipping cream, 3 Tbs of butter, cooked tomatoes & 2 Tbs of Cajun seasoning. Stir to combine. Heat over medium-low heat. Once warm add 2 cups shredded Parmesan cheese & 1 additional cup of heavy cream. Stir to combine. Once cheese is melted add cooked shrimp (With Juices) & pasta to sauce. Stir to combine. Sprinkle with more Cajun seasoning to your liking and parsley..

So that's going to wrap it up with this exceptional food cajun shrimp alfredo recipe. Thanks so much for your time. I am sure you can make this at home. There is gonna be more interesting food in home recipes coming up. Don't forget to bookmark this page in your browser, and share it to your loved ones, colleague and friends. Thanks again for reading. Go on get cooking!

Recipe of Ultimate Tender and Crispy Pan Fried Chicken Breast With
Herbed Breadcrumbs

Recipe of Ultimate Tender and Crispy Pan Fried Chicken Breast With Herbed Breadcrumbs

Tender and Crispy Pan Fried Chicken Breast With Herbed Breadcrumbs.

Tender and Crispy Pan Fried Chicken Breast With Herbed Breadcrumbs

Hey everyone, it's Brad, welcome to our recipe page. Today, I will show you a way to make a special dish, tender and crispy pan fried chicken breast with herbed breadcrumbs. It is one of my favorites. For mine, I will make it a little bit tasty. This is gonna smell and look delicious.

Tender and Crispy Pan Fried Chicken Breast With Herbed Breadcrumbs is one of the most favored of current trending meals in the world. It is appreciated by millions daily. It's simple, it's fast, it tastes delicious. They are fine and they look fantastic. Tender and Crispy Pan Fried Chicken Breast With Herbed Breadcrumbs is something which I have loved my whole life.

To get started with this recipe, we must first prepare a few components. You can have tender and crispy pan fried chicken breast with herbed breadcrumbs using 11 ingredients and 10 steps. Here is how you cook it.

The ingredients needed to make Tender and Crispy Pan Fried Chicken Breast With Herbed Breadcrumbs:

  1. {Make ready of Chicken breasts.
  2. {Get of Cooking sake.
  3. {Make ready of Salt.
  4. {Make ready of ☆ Panko.
  5. {Take of ☆Grated cheese.
  6. {Prepare of ☆Dried basil.
  7. {Make ready of ☆Dried oregano.
  8. {Get of ☆Coarsely ground black pepper.
  9. {Get of ☆Olive oil.
  10. {Get of Cake flour.
  11. {Take of Olive oil.

Steps to make Tender and Crispy Pan Fried Chicken Breast With Herbed Breadcrumbs:

  1. The day before: Put the whole chicken breasts with the cooking sake and salt in a plastic bag. Rub the flavorings into the meat lightly over the bag, and leave to marinate overnight..
  2. The day you plan to serve it: Put the ☆ ingredients in a bowl and mix well. This is easier if you open up a plastic bag in the bowl and mix the ingredients in the bag..
  3. Take the chicken breasts out of the marinating bag, and cut diagonally into easy to eat pieces. Put the cut up chicken back into the bag, add the cake flour and coat the chicken with it..
  4. Add enough olive oil to cover the bottom of a frying pan, and heat..
  5. Transfer the flour-coated chicken to the bag with the ☆ ingredients, and coat the chicken evenly with the herbed panko..
  6. Pan fry the chicken..
  7. When they're golden brown on one side, turn the piece over. When the chicken is browned on both sides it's done..
  8. Sprinkle with some chopped parsley to make it look pretty..
  9. The flour acts as a binder, so the breadcrumb coating will stick well to the chicken and make it easy to eat..
  10. Try white fish instead of chicken. This is delicious too..

So that is going to wrap this up with this special food tender and crispy pan fried chicken breast with herbed breadcrumbs recipe. Thank you very much for reading. I'm confident you will make this at home. There is gonna be interesting food in home recipes coming up. Remember to bookmark this page in your browser, and share it to your loved ones, colleague and friends. Thank you for reading. Go on get cooking!

Steps to Prepare Speedy Old fashioned kettle corn

Steps to Prepare Speedy Old fashioned kettle corn

Old fashioned kettle corn.

Old fashioned kettle corn

Hello everybody, hope you are having an amazing day today. Today, I'm gonna show you how to make a distinctive dish, old fashioned kettle corn. One of my favorites food recipes. This time, I am going to make it a bit tasty. This will be really delicious.

Old fashioned kettle corn is one of the most well liked of recent trending foods on earth. It's appreciated by millions every day. It's simple, it is quick, it tastes yummy. Old fashioned kettle corn is something that I've loved my whole life. They're fine and they look fantastic.

To get started with this particular recipe, we have to first prepare a few components. You can cook old fashioned kettle corn using 4 ingredients and 6 steps. Here is how you cook it.

The ingredients needed to make Old fashioned kettle corn:

  1. {Make ready 1/2 cup of corn kernels.
  2. {Get 1/4 cup of granulated sugar.
  3. {Take 1/4 cup of cooking oil.
  4. {Get dash of salt.

Steps to make Old fashioned kettle corn:

  1. Place the oil in the bottom of a large pot along with 3 corn kernels. On a medium flame. When the 3 kernels pop the temp is just right..
  2. Add in the unpopped popcorn kernels and sugar. Give it a quick stir and put the lid back on..
  3. .
  4. Over a medium heat start popping the popcorn, constantly shaking the pot to ensure that the popcorn kernels and oil do not burn..
  5. Once the popping has slowed down remove the pot from the heat and pour into a large bowl..
  6. Sprinkle a touch of salt..

So that's going to wrap it up for this special food old fashioned kettle corn recipe. Thanks so much for reading. I'm sure you can make this at home. There's gonna be interesting food in home recipes coming up. Remember to save this page on your browser, and share it to your loved ones, friends and colleague. Thank you for reading. Go on get cooking!

Step-by-Step Guide to Prepare Ultimate Bacon, Tomato & Barley Soup

Step-by-Step Guide to Prepare Ultimate Bacon, Tomato & Barley Soup

Bacon, Tomato & Barley Soup.

Bacon, Tomato & Barley Soup

Hey everyone, it's Louise, welcome to our recipe page. Today, we're going to make a special dish, bacon, tomato & barley soup. One of my favorites. For mine, I will make it a little bit tasty. This will be really delicious.

Bacon, Tomato & Barley Soup is one of the most popular of recent trending foods on earth. It is appreciated by millions every day. It is easy, it's fast, it tastes yummy. They're nice and they look wonderful. Bacon, Tomato & Barley Soup is something that I've loved my entire life.

To begin with this recipe, we have to prepare a few ingredients. You can cook bacon, tomato & barley soup using 13 ingredients and 4 steps. Here is how you cook that.

The ingredients needed to make Bacon, Tomato & Barley Soup:

  1. {Take 3 tbsp of olive oil.
  2. {Prepare 150 grams of streaky bacon, finley chopped.
  3. {Make ready 1 large of red onion,peeled and finely chopped.
  4. {Take 2 of stalks celery, finely sliced.
  5. {Make ready 2 of carrots,chopped.
  6. {Take 2 clove of garlic,finely chopped.
  7. {Get 2 can of tomatoes.
  8. {Get 3 cup of chicken stock.
  9. {Get 1/2 cup of pearl barley.
  10. {Take 1/4 of cabbage, shredded.
  11. {Prepare 1/4 cup of parsley,finely chopped.
  12. {Get 1 of shaved parmesan to garnish ( optional).
  13. {Prepare 1 of salt and pepper to taste.

Steps to make Bacon, Tomato & Barley Soup:

  1. Heat the oil in a large saucepan and gently cook bacon, onion, celery, carrots and garlic until tender..
  2. Add the tomatoes and chicken stock to the pan and bring to the boil..
  3. Add pearl barley, turn heat down and simmer for 30-40 minutes until tender..
  4. Season the soup to taste. Add the cabbage and parsley and cook for a further 15 minutes. Serve as is or garnish with the shaved parmesan..

So that's going to wrap it up for this exceptional food bacon, tomato & barley soup recipe. Thank you very much for your time. I am sure you can make this at home. There's gonna be more interesting food at home recipes coming up. Remember to bookmark this page in your browser, and share it to your loved ones, friends and colleague. Thank you for reading. Go on get cooking!

How to Prepare Homemade Walnut Hara Bhara kabab 🥰🥰🥰❤️😋

How to Prepare Homemade Walnut Hara Bhara kabab 🥰🥰🥰❤️😋

Walnut Hara Bhara kabab 🥰🥰🥰❤️😋.

Walnut Hara Bhara kabab 🥰🥰🥰❤️😋

Hello everybody, hope you're having an amazing day today. Today, I'm gonna show you how to make a distinctive dish, walnut hara bhara kabab 🥰🥰🥰❤️😋. One of my favorites food recipes. This time, I'm gonna make it a bit tasty. This is gonna smell and look delicious.

Walnut Hara Bhara kabab 🥰🥰🥰❤️😋 is one of the most favored of current trending meals on earth. It's enjoyed by millions every day. It is easy, it is fast, it tastes yummy. They're fine and they look wonderful. Walnut Hara Bhara kabab 🥰🥰🥰❤️😋 is something that I have loved my entire life.

To get started with this recipe, we have to prepare a few components. You can cook walnut hara bhara kabab 🥰🥰🥰❤️😋 using 13 ingredients and 9 steps. Here is how you can achieve that.

The ingredients needed to make Walnut Hara Bhara kabab 🥰🥰🥰❤️😋:

  1. {Get 3/4 cups of Walnut.
  2. {Prepare 1/2 cup of Cookpad green peas.
  3. {Prepare some of Blanched spinach leaves.
  4. {Get 3 of Green chillies.
  5. {Get As required of Coriander leaves.
  6. {Prepare as required of Chopped ginger.
  7. {Take 2 of Boiled potatoes.
  8. {Prepare as per taste of Salt.
  9. {Get 1 tsp of Chaat masala.
  10. {Get 1 tsp of Cumin powder.
  11. {Prepare 2 tbsp of flour/besan.
  12. {Get as required of Oil for frying.
  13. {Make ready 2 tbsp of Blade crumbs.

Steps to make Walnut Hara Bhara kabab 🥰🥰🥰❤️😋:

  1. Pulse the walnuts couple of times to a coarse powder. Keep it aside..
  2. To the mixer, jar adds cooked peas, balanced palak leaves, green chilies, coriander leaves, ginger, and pulse it. keep this aside..
  3. To a bowl add boiled potatoes, ground green paste, powdered walnut, salt, chaat masala, cumin powder, garam masala, besan, bread crumbs, and mix everything..
  4. Mash the potatoes and mix everything well..
  5. Take a handful of the kebab mixture and flatten them to desired shapes..
  6. To a pan, add oil for frying and place the kebab..
  7. Fry them until golden brown on both sides..
  8. Walnut Hara Bhara kabab is ready 😋.
  9. Serve with coriander chutney, 😋 tomato sauce 😋😋.

So that's going to wrap this up for this special food walnut hara bhara kabab 🥰🥰🥰❤️😋 recipe. Thanks so much for your time. I'm confident that you will make this at home. There's gonna be more interesting food at home recipes coming up. Don't forget to save this page in your browser, and share it to your family, friends and colleague. Thanks again for reading. Go on get cooking!

Recipe of Homemade Barley beancurd dessert

Recipe of Homemade Barley beancurd dessert

Barley beancurd dessert. Beancurd skin ginkgo nut barley dessert is a popular dessert among Asian, it is a light and nutritious dessert with a rich soy milk taste. How to make a silky smooth barley bean curd dessert. Add the bean curd sheet into the pot.

Barley beancurd dessert Don't cover entirely as it will spill. Check the bean curd sheets for the consistency you like (big pieces or congee-like fine). A close-up shot of Chinese bean curd, ginkgo nuts, and barley sweet soup (腐竹白果薏米糖水).

Hello everybody, I hope you're having an incredible day today. Today, I will show you a way to prepare a special dish, barley beancurd dessert. It is one of my favorites. For mine, I'm gonna make it a bit tasty. This is gonna smell and look delicious.

Beancurd skin ginkgo nut barley dessert is a popular dessert among Asian, it is a light and nutritious dessert with a rich soy milk taste. How to make a silky smooth barley bean curd dessert. Add the bean curd sheet into the pot.

Barley beancurd dessert is one of the most favored of current trending meals on earth. It's appreciated by millions every day. It is simple, it is quick, it tastes delicious. Barley beancurd dessert is something which I have loved my entire life. They are fine and they look wonderful.

To begin with this particular recipe, we must first prepare a few components. You can cook barley beancurd dessert using 5 ingredients and 6 steps. Here is how you cook that.

The ingredients needed to make Barley beancurd dessert:

  1. {Prepare 1 cups of holland barley.
  2. {Make ready 75 grams of beancurd for dessert.
  3. {Get 200 grams of pre-boiled gingko nuts.
  4. {Take To taste of rock sugar.
  5. {Get A few of pcs pandan leaves, knotted.

Chinese, especially Cantonese cuisine, has so many delicious sweet/dessert soup. These soups are usually easy to prepare and super healthy. The Best Barley Dessert Recipes on Yummly Taro Balls Dessert With Mung Bean And Barley, Dried Beancurd And Ginkgo Nuts Dessert (白果腐竹雞蛋薏米糖水).

Instructions to make Barley beancurd dessert:

  1. Wash clean holland barley. There are 2 different type of barley that can be easily found in singapore. Chinese barley has cooling properties, but the taste is a bit funny. Holland barley tastes nicer, suitable for dessert but some says it can cause phlegm. I use holland barley for this dessert as i like the taste more..
  2. Smash the beancurd sheet to smaller pieces. Pls make sure you use the one for dessert. There is other type of beancurd sheet for soup too but it is more oily and the texture is different..
  3. Now the gingko nuts. I bought the pre-boiled gingko nuts. Some says that we need to remove the core to avoid any bitter taste in this dessert..
  4. Prepare 3L of water, cook barley and beancurd together. Add pandan leaves. I use pressure cooker so it takes me like 5 mins and all are tender already. Beancurd will be very soft like porridge consistency. Some people doesn’t like porridge consistency so you can cook the beancurd later on. If you use normal pot/pan, it probably takes 30 minutes to cook the barley till tender..
  5. Add gingko nuts and boil for another 10 minutes. Add rock sugars to taste..
  6. Done! Can be served cold or warm. I like mine cold..

Gingko nut, bean curd and barley dessert. Add gingko nuts and soaked beancurd sheets. Because this dessert benefits our health and it's tasty. Most Cantonese believed that having dessert soup daily helps to rejuvenate skin and promote better complexion. A traditional Chinese dessert or 'soothing' tonic made with beancurd sheets.

So that's going to wrap this up with this special food barley beancurd dessert recipe. Thanks so much for your time. I am sure you can make this at home. There's gonna be more interesting food at home recipes coming up. Remember to save this page on your browser, and share it to your loved ones, friends and colleague. Thank you for reading. Go on get cooking!

Steps to Make Speedy Chole Samosa Chaat

Steps to Make Speedy Chole Samosa Chaat

Chole Samosa Chaat.

Chole Samosa Chaat

Hey everyone, hope you are having an amazing day today. Today, I will show you a way to make a distinctive dish, chole samosa chaat. It is one of my favorites. This time, I'm gonna make it a bit unique. This will be really delicious.

Chole Samosa Chaat is one of the most well liked of current trending foods in the world. It's easy, it is fast, it tastes yummy. It's enjoyed by millions daily. Chole Samosa Chaat is something which I have loved my whole life. They're nice and they look wonderful.

To begin with this particular recipe, we must first prepare a few ingredients. You can cook chole samosa chaat using 7 ingredients and 2 steps. Here is how you can achieve it.

The ingredients needed to make Chole Samosa Chaat:

  1. {Take of chole sabzi/ chickpeas see my chole recipe).
  2. {Prepare of samosa (see my samosa recipe).
  3. {Take of curd.
  4. {Take of green chutney.
  5. {Make ready of sweet chutney.
  6. {Make ready of onion sliced.
  7. {Make ready of chaat masala.

Instructions to make Chole Samosa Chaat:

  1. Chole - made the rcp in the same way usually I do it. Just that I have not added kashmiri red chili powder. Add 1-2 tsp chaat masala in the curd and mix well..
  2. In a plate spread the chole, keep the samosa's in the centre. Spread curd and both the chutneys. Finally garnish it with onions. Serve the chatpata chole samosa chaat..

So that's going to wrap it up with this special food chole samosa chaat recipe. Thanks so much for your time. I am confident that you will make this at home. There is gonna be interesting food in home recipes coming up. Don't forget to bookmark this page on your browser, and share it to your family, colleague and friends. Thanks again for reading. Go on get cooking!

Step-by-Step Guide to Prepare Super Quick Homemade Veg Dum Biryani
recipe

Step-by-Step Guide to Prepare Super Quick Homemade Veg Dum Biryani recipe

Veg Dum Biryani recipe.

Veg Dum Biryani recipe

Hello everybody, hope you are having an incredible day today. Today, I'm gonna show you how to prepare a special dish, veg dum biryani recipe. One of my favorites food recipes. For mine, I'm gonna make it a bit unique. This will be really delicious.

Veg Dum Biryani recipe is one of the most popular of current trending foods on earth. It's simple, it is fast, it tastes delicious. It is appreciated by millions every day. Veg Dum Biryani recipe is something which I've loved my entire life. They're nice and they look fantastic.

To begin with this recipe, we must first prepare a few components. You can cook veg dum biryani recipe using 28 ingredients and 13 steps. Here is how you cook that.

The ingredients needed to make Veg Dum Biryani recipe:

  1. {Prepare of Boiling Rice.
  2. {Get 2 cups of Basmati Rice.
  3. {Make ready 1 of Bay leaf.
  4. {Get 3-4 of cloves.
  5. {Take 1 stick of cinnamon.
  6. {Take 2-3 of whole black pepper.
  7. {Take as per taste of Salt.
  8. {Get as required of Oil.
  9. {Take of Vegetable Marinate.
  10. {Prepare 3-4 of diced Carrot.
  11. {Prepare 6-7 of sliced French beans.
  12. {Get as per need of Some cauliflower.
  13. {Make ready 1/4 cup of curd.
  14. {Make ready 1 1/2 tsp of - red Chilli powder.
  15. {Prepare 1/2 tsp of - turmeric powder.
  16. {Prepare 2tsp of -Dhania powder.
  17. {Take 3/4tsp of Garam masala.
  18. {Take 1/2tsp of Black pepper.
  19. {Take as required of Some mint leaves.
  20. {Make ready 2 1/2 tsp- of biryani masala.
  21. {Make ready 1/4 tsp of Cinnamon Powder.
  22. {Prepare of Caramelized Onion.
  23. {Get 2 of onions sliced.
  24. {Get as required of Oil.
  25. {Get of Saffron water.
  26. {Take 5-6 strands of saffron.
  27. {Take 1/4cup of warm water.
  28. {Prepare of Dough for sealing.

Steps to make Veg Dum Biryani recipe:

  1. First take 2 cups of Basmati rice wash them and soak them in water for 2 hr.
  2. Take a vessel filled with water boil it and add a bay leaf, clove, whole black pepper, Cinnamon stick, salt and oil in the water and let it boil..
  3. Put the soaked rice in the boiling water and boil rice for 6-7 mins until rice are half cooked. Strain the rice..
  4. Now for vegetable marinate take carrot, French beans and cauliflower..
  5. To that add curd, red Chilli powder, dhania powder, garam masala, turmeric powder, Cinnamon powder, black pepper powder, salt and some mint leaves. Mix that well..
  6. Let the the vegetables marinate for 1 hr after that saute that on a pan for 4-5 mins..
  7. For caramelized onion take a pan and oil to that. Saute it on a high flame until onion colour changes to brown. After that turn flame to low for onion to become crisp..
  8. For saffron water infuse 5-6 saffron strands in some hot water..
  9. Now comes part of layering biryani. You can do that in hindi or kadhai..
  10. First add some layer of marinated veggies now add a layer of rice over it add the caramelized onion and the saffron water over it.
  11. Cover the kadhai or hand with lid and seal it with some dough..
  12. First turn flame high for 2 mins. Then turn flame to the least and let biryani dum for 10-15 mins..
  13. Open the lid and the biryani is ready. Serve it with some raita..

So that's going to wrap this up with this exceptional food veg dum biryani recipe recipe. Thank you very much for your time. I'm sure that you can make this at home. There is gonna be more interesting food in home recipes coming up. Don't forget to save this page on your browser, and share it to your loved ones, friends and colleague. Thanks again for reading. Go on get cooking!

How to Prepare Perfect Organic Kettle Corn

How to Prepare Perfect Organic Kettle Corn

Organic Kettle Corn.

Organic Kettle Corn

Hey everyone, I hope you're having an incredible day today. Today, I will show you a way to make a distinctive dish, organic kettle corn. It is one of my favorites food recipes. This time, I will make it a little bit tasty. This will be really delicious.

Organic Kettle Corn is one of the most popular of recent trending meals in the world. It's appreciated by millions every day. It's simple, it is quick, it tastes delicious. Organic Kettle Corn is something which I've loved my entire life. They are nice and they look wonderful.

To begin with this particular recipe, we must first prepare a few ingredients. You can have organic kettle corn using 4 ingredients and 5 steps. Here is how you cook it.

The ingredients needed to make Organic Kettle Corn:

  1. {Make ready 1/2 cup of uncooked popcorn.
  2. {Get 1/4 cup of butter.
  3. {Take 1/2 cup of powdered sugar.
  4. {Take 1 tsp of salt.

Instructions to make Organic Kettle Corn:

  1. Cook popcorn..
  2. Melt butter.
  3. Add salt & sugar to butter to make a thick paste.
  4. Add to popcorn. Stir to evenly coat..
  5. Let cool..

So that's going to wrap it up with this exceptional food organic kettle corn recipe. Thanks so much for reading. I am sure you will make this at home. There is gonna be interesting food in home recipes coming up. Don't forget to save this page on your browser, and share it to your family, friends and colleague. Thanks again for reading. Go on get cooking!

Recipe of Super Quick Homemade Chili Cheese Bean Dip

Recipe of Super Quick Homemade Chili Cheese Bean Dip

Chili Cheese Bean Dip.

Chili Cheese Bean Dip

Hey everyone, it's me, Dave, welcome to my recipe page. Today, we're going to prepare a distinctive dish, chili cheese bean dip. One of my favorites. This time, I am going to make it a bit tasty. This is gonna smell and look delicious.

Chili Cheese Bean Dip is one of the most well liked of current trending meals in the world. It is enjoyed by millions daily. It is easy, it is fast, it tastes yummy. Chili Cheese Bean Dip is something that I've loved my entire life. They're fine and they look wonderful.

To get started with this recipe, we must prepare a few ingredients. You can have chili cheese bean dip using 3 ingredients and 3 steps. Here is how you cook it.

The ingredients needed to make Chili Cheese Bean Dip:

  1. {Make ready 1 block of Cream cheese softened.
  2. {Make ready 1 can of Chili with beans.
  3. {Get 2 cups of Shredded Cheddar Cheese.

Steps to make Chili Cheese Bean Dip:

  1. In a Microwave safe bowl spread Cream Cheese on the bottom of the bowl. Next spread Chili with Beans on top of the Cream Cheese. Do not mix together! Sprinkle Chedder Cheese on top..
  2. Depending on your microwave, you would microwave on high for 6-8 minutes. Until everything is hot!.
  3. Serve with bread, toast &  Tostitos chips After heating, you could top with a couple of your favorite things. Cut up small tomatoes, black olives & peppers etc. Enjoy!.

So that's going to wrap this up with this exceptional food chili cheese bean dip recipe. Thank you very much for reading. I am sure you can make this at home. There's gonna be interesting food at home recipes coming up. Don't forget to bookmark this page on your browser, and share it to your family, friends and colleague. Thanks again for reading. Go on get cooking!

Recipe of Award-winning Soft & Crispy Chicken Katsu

Recipe of Award-winning Soft & Crispy Chicken Katsu

Soft & Crispy Chicken Katsu.

Soft & Crispy Chicken Katsu

Hey everyone, I hope you're having an amazing day today. Today, I will show you a way to make a distinctive dish, soft & crispy chicken katsu. It is one of my favorites. This time, I will make it a little bit tasty. This will be really delicious.

Soft & Crispy Chicken Katsu is one of the most popular of recent trending foods on earth. It's easy, it's fast, it tastes yummy. It's appreciated by millions daily. They are fine and they look fantastic. Soft & Crispy Chicken Katsu is something which I have loved my entire life.

To begin with this recipe, we must first prepare a few ingredients. You can have soft & crispy chicken katsu using 9 ingredients and 6 steps. Here is how you can achieve it.

The ingredients needed to make Soft & Crispy Chicken Katsu:

  1. {Get of Chicken breast.
  2. {Make ready of Onion.
  3. {Take of Sake.
  4. {Make ready of Japanese-style Worcestershire Sauce.
  5. {Prepare of Mayonnaise.
  6. {Get of Egg.
  7. {Get of Plain flour.
  8. {Get of Panko.
  9. {Take of Vegetable oil.

Instructions to make Soft & Crispy Chicken Katsu:

  1. Discard the skin and fat from the chicken breast. Slice the chicken on the diagonal. Pound with a meat mallet and marinate with grated onion and sake for awhile (this will soften the meat)..
  2. After about 30 minutes, add the sauce (I mix regular and thick Japanese worcester-style sauce) and mayonnaise and rub in. Let it marinate..
  3. Beat the egg and mix in the flour. Mix well to create a thick egg liquid and then dredge the meat from Step 2..
  4. Dip the chicken in panko and deep-fry slowly in medium-hot oil. At the end of cooking, increase the heat and fry until crisp..
  5. Remove the chicken pieces vertically from the oil and prop them up to let the oil drain. This prevents the breading from getting soggy and keeps it crunchy..
  6. Serve with sauce and fresh-squeezed lemon juice and enjoy. It's also delicious plain because of the marinade!.

So that is going to wrap this up with this exceptional food soft & crispy chicken katsu recipe. Thanks so much for reading. I'm sure you will make this at home. There is gonna be interesting food at home recipes coming up. Remember to save this page on your browser, and share it to your family, friends and colleague. Thank you for reading. Go on get cooking!

Recipe of Perfect Seafood Ehomaki (Lucky Fat Sushi Rolls)

Recipe of Perfect Seafood Ehomaki (Lucky Fat Sushi Rolls)

Seafood Ehomaki (Lucky Fat Sushi Rolls).

Seafood Ehomaki (Lucky Fat Sushi Rolls)

Hey everyone, it is Brad, welcome to our recipe site. Today, we're going to prepare a distinctive dish, seafood ehomaki (lucky fat sushi rolls). One of my favorites. This time, I am going to make it a bit tasty. This is gonna smell and look delicious.

Seafood Ehomaki (Lucky Fat Sushi Rolls) is one of the most well liked of recent trending meals on earth. It is easy, it's fast, it tastes yummy. It's appreciated by millions every day. They're nice and they look fantastic. Seafood Ehomaki (Lucky Fat Sushi Rolls) is something which I've loved my whole life.

To get started with this recipe, we have to first prepare a few ingredients. You can cook seafood ehomaki (lucky fat sushi rolls) using 12 ingredients and 6 steps. Here is how you cook it.

The ingredients needed to make Seafood Ehomaki (Lucky Fat Sushi Rolls):

  1. {Make ready 1 of Cooked white rice 4 to 5 rice cooker cups (1320 to 1650 grams cooked, using 720 ml to 900 ml uncooked raw rice).
  2. {Prepare 10 cm of Kombu.
  3. {Get 2 tbsp of Sake.
  4. {Prepare 3 of to 5 tablespoons ○ Sugar.
  5. {Get 1 tsp of ○ Salt.
  6. {Prepare 1 dash of over 100 ml ○ Vinegar.
  7. {Get 5 of to 7 sheets, nori seaweed.
  8. {Take 200 grams of Sashimi grade tuna.
  9. {Prepare 120 grams of Salmon (smoked or sashimi grade).
  10. {Get 150 grams of Squid (sashimi grade).
  11. {Make ready 5/8 of Cucumber.
  12. {Make ready 50 grams of Shredded egg crepes (or Japanese atsuyaki thick omlette or dashimaki rolled omlette).

Steps to make Seafood Ehomaki (Lucky Fat Sushi Rolls):

  1. I use a handy fat sushi roll mold that I bought at a 100 yen shop, but you can also use a sushi mat. After rinsing the rice, I strain it and let it sit for 30 minutes. Then, I make small cuts on both sides of the konbu, add it to the rice together with sake, and then cook the rice. Next, I mix in the seasoned rice vinegar and cool off the rice with a hand-held fan. Finally, I put a damp cloth over the rice..
  2. The next step is to gather the filling ingredients. Shredded egg crepes, cucumbers, squid, salmon (either cheap smoked salmon or sashimi), and fresh, sashimi grade tuna. This will complete your color palatte of yellow, green, white, orange and red. Aside from the shredded egg crepe, all the ingredients should be cut lengthwise. For adults, use squid or salmon, together with a touch of wasabi..
  3. Wet the inner surface of the mold each time with water. Fill the mold with sushi rice, lay a 1/2 sheet of sushi nori in the center, arrange the fillers inside the nori, taking care to balance the colors, and seal the nori around fillers. Fill the rest of the mold with sushi rice and press the cover on..
  4. Drop the contents onto a sheet of sushi nori and roll to create an instant futomaki fat sushi roll! Even after making 5 rolls, a small bowl of sushi rice is left over. You can use that to make a mini Tekkadon (sushi rice topped with thin-sliced raw tuna sashimi) or Nattodon (sushi rice topped with fermented soy beans)..
  5. Cut them to serve. If you want to use less rice, just add more ingredients, if you please..
  6. Since my eldest son loves any kind of sashimi tuna, I fill these with plenty of tuna..

So that's going to wrap this up with this special food seafood ehomaki (lucky fat sushi rolls) recipe. Thank you very much for your time. I am sure you can make this at home. There is gonna be more interesting food in home recipes coming up. Don't forget to save this page in your browser, and share it to your loved ones, friends and colleague. Thank you for reading. Go on get cooking!